A blog devoted to the cards I make in my tiny upstairs space. When my sister stays there, she calls it an "artist's garret". I'm not an artist, but am an enthusiastic cardmaker - hence the title "Cardmaker's Garret".
___________________________________________________________________________________________
Showing posts with label Christmas Star. Show all posts

Saturday, 19 October 2024

Sheep in Red Sweaters

The Peace on Earth's mood boards almost always inspire me!  This time one of the images immediately made me think of my stamp of two sheep in Christmas sweaters.


A quick make - stamped and watercoloured and trimmed with a stitched rectangle before putting on the card base.  I used gold metallic paint for the star in the sky and the stars on one of the sweaters, and splattered a bit of gold paint and the grey paint I used for the ground.

Here's the Peace on Earth mood board:
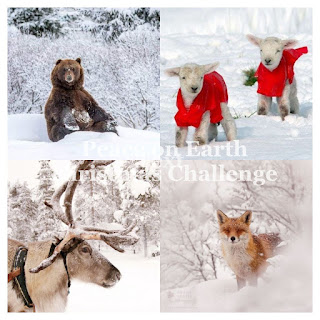


Head over to Peace on Earth to see how the rest of the Design Team were inspired and then come and join us!


Supplies:
Stamps - Inky Doodles
Ink - Versafine Onyx Black
Paper - watercolour paper, off white card base
Size - A2
Accessories - watercolour paints, gold metallic paint, Lil Inkers stitched rectangle die

Wednesday, 28 February 2024

Group of Seven Stencilled Stars

For this month's Group of Seven Cardmakers' technique, we are trying something called Masked Stencilling.  It was inspired by this card on Pat's Colourful Creations.  Basically you mask off part of your card front and stencil over the rest.  Here's my card:


I used one of the dies I use for cutting slopes or snow banks to cut a mask.  I laid that mask over the bottom right section of my card front and then stencilled the stars with a blend of two Distress inks and a gold ink.  I removed the mask and stamped my sentiment in the area that was masked.  I die cut the Christmas star twice out of white cs and once out of gold glitter cs and glued them together.  I popped the panel up on fun foam for more dimension.

There's lots of other ideas for using this technique on our Group of Seven post.  Feel free to give it a try but be aware, we're not a challenge blog - your linked cards will only be to provide more inspiration.


Supplies:
Stamps - Great Impressions sentiment
Ink - Distress Fossilized Amber and Wild Honey, Delicata Golden Glitz
Paper - cream cs, gold glitter cs
Size - A2
Accessories - handmade star stencil, masking paper, fun foam, star of wonder die, slope (hill) die

Monday, 26 September 2022

CAS Gilded Star

The Sparkles Christmas Challenge is asking for a CAS (clean and simple) card. 


I sprayed and splattered the card base with gold and copper sprays, and stamped the sentiment.

For the star, I used FlitterGlu and gilding flakes on the star stamp and stamped it on black cs - I'd done this technique on white cs before and wanted to see how the gilding flakes were on black. I then fussy cut it, scored it, folded it, and popped it up with foam tape.

Sparkles Christmas Challenge


Please take a copy of our badge


Supplies:
Stamps - SU Christmas star, Great Impressions sentiment
Ink - Versafine Clair Nocturne
Paper - black and white cs
Size - 5" square
Accessories - gilding flakes, Flitter Glu, gold and copper sprays, foam tape

Monday, 7 March 2022

Two Blue Cards

First up, Christmas Craft Creations "Blue & Silver" challenge.


I created a tissue paper background, using a little piece of blue tissue paper that has silver dots in it - I glued it to a scrap of cs, slightly wrinkling it as I laid it down so that it would have some texture.  I then die cut a thin frame out of it.  I die cut the same thin frame out of silver glitter cs and inlaid it into the blue tissue paper piece.  Out of another scrap of silver glitter cs, I die cut the star, and from a scrap of white cs, I cut the trees.  Added a sentiment and put it all together.

Because of all the scraps I used, I'm also adding it to the new Snippets challenge.

The second blue card is for the Christmas Kickstart Challenge "Snowflakes are Winter's Butterflies" and for the Jingle Belles Challenge "Oh Christmas Stencil".


I pulled a scrap of background out of my box that had been painted with a blue shimmer acrylic paint, and stencilled snowflakes over it with a sparkle paste.  I used a white shimmer cs for the die cut frame and card base, and added a sentiment heat embossed on black cs and die cut with an old label die.

Challenges:

Snippets Playground
Player's Badge

Christmas Craft Creations


Christmas Kickstart Challenge


Jingle Belles "Oh Christmas Stencil"


Supplies for card 1:
Stamps - SSS sentiment
Ink - Distress Oxide Salty Ocean
Paper - white cs, silver glitter cs, blue with silver dots tissue paper
Size - 6x4.25"
Accessories - SSS thin frame die, Memory Box star of wonder die, unknown tree die

Supplies for card 2:
Stamps - unknown sentiment
Ink - ColorBox white
Paper - white shimmer cs, black cs, mixed media cs
Size - 4.75" square
Accessories - white embossing powder, MFT pierced square frame die, Spellbinders label die, Paper Roses snowflake stencil, blue shimmer acrylic paint, Cosmic Shimmer sparkle paste


Saturday, 23 January 2021

Splatters and a Star

I am trying to use some of my older SU stamps in order to decide if I'll keep them or not.  This Christmas star is very versatile so it's definitely going into the "keeper" pile.


I sprayed and splattered the background with gold and copper sprays. For the splattering, I took the top off the container and tapped the tube against a ruler.  I used FlitterGlu and gilding flakes on the star stamp (instead of heat embossing it like I normally do with this stamp) and then fussy cut it, scored it, folded it, and popped it up with foam tape. I put the sentiment on a die cut label.

I'm linking it up at the CAS Mix Up Challenge "Splatters".  I've more than covered off the mixed media requirements - I've got stamping, sprays, splatters, gilding flakes, fussy cutting, scoring, and die cutting!


Supplies:
Stamps - SU Christmas Star, unknown sentiment
Ink - Delicata copper
Paper - white cs
Size - 4.75" square
Accessories - copper and gold sprays, gilding flakes, FlitterGlu, foam tape, Spellbinders label die

Tuesday, 10 March 2020

Big and Small vs Symmetry

Two cards today that are kind of opposites to each other.  One is for a "big and small" challenge, the other for a "symmetry" challenge.

First up for Less is More "Big and Small".


I went with a very big star and some very small stars:


I stamped the star in white pigment ink and heat embossed with Shabby White embossing powder and some sprinkles of gold UTEE for extra texture.

I fussy cut the star, scored and folded it, and popped it up with pieces of fun foam (3 pieces layered in the centre, 2 pieces layered in each point of the star so that I could get the centre higher than the points).

I stamped and heat embossed the sentiment and scattered tiny gold sequins and stars around the outside.


And then for Addicted to CAS Code Word "symmetry".


I used the same image on each side of the sentiment:

I used the old SU Baroque Motifs stamp. I stamped it in brown twice, with my sentiment in between, bordered it with brown cs, and popped it up on fun foam.

I'm sending it to my 28 year old nephew as he likes interesting quotes and he was questioning his own feelings of happiness, so thought this would count as an encouraging word for him.


Supplies for card 1:
Stamps - SU Christmas Star, unknown sentiment
Ink - ColorBox gold and white
Paper - white cs
Size - 5.25" square
Accessories - gold embossing powder, tiny gold stars and sequins, Stampendous Shabby White embossing powder, gold UTEE, foam tape

Supplies for card 2:
Stamps - SU Baroque Motifs, Penny Black sentiment
Ink - SU Baked Brown Sugar
Paper - white, brown, and rustic cs
Size - 6.5x4.25"
Accessories - fun foam


Sunday, 17 March 2019

Reindeer Gazing on the Star of Wonder

Have you entered a card in the CAS Christmas challenge yet?  I'm hosting this month, and I chose "Deer" as the theme.


I wanted to do something quite different to the card I did for the opening of the challenge.


I started by sponging the deep blue sky, adding a bit of gold sponging in the area where the star would be giving off light.  I die cut two of the star of wonder, gluing them together to give that star more substance than the three small stars that were just single layers.

I tore two strips of white cs for snowy ground.  I stamped my sentiment on the lower one - it's actually just the first line of a longer sentiment.  I die cut the reindeer out of dark bronze shimmer cs (unfortunately it looks black in the photo) and added it to the upper strip of snow in a position where he is looking up at the star of wonder.  I put a bit of foam tape under his neck and head to emphasize him looking up.


It's CAS Christmas's first birthday, so we'd love to have you join us this month!


You have until March 24th to link up your card.  For more inspiration, head over to CAS Christmas and take a look at the cards by the rest of the Design Team and this month's Guest Designer, Chrissie (Simply One of a Kind).


Supplies:
Stamps - Serendipity sentiment
Ink - Delicata Golden Glitz, Distress Chipped Sapphire
Paper - white, gold shimmer, and dark bronze shimmer cs
Size - 6x4.25"
Accessories - Dee's Distinctively deer die, Memory Box Star of Wonder die, small star die, foam tape


Tuesday, 30 October 2018

Red Star with Snowflakes

I seem to be on a roll with using some of my older supplies these days.

I spotted the Just Us Girls photo inspiration challenge:


And immediately knew that I wanted to get out the old Stampin Up Christmas Star stamp.


I stamped it in Versamark and heat embossed in red, then fussy cut it, scored its lines, and folded it to get dimension.

I also smeared a scrap of cs with Versamark and heat embossed in the same red so that I would have a matching piece to use for my die cut sentiment.

I wanted to capture the large white snowflakes in the inspiration photo so dry embossed the background with an embossing folder depicting large snowflakes.

The star is glued down on its points and popped up with double and triple layers of foam tape in the centre, giving it lots of dimension.

It's also perfect for the Less is More challenge:


I really love all the challenges out there that are inspiring my Christmas cards right now!


Supplies:
Stamps - SU Christmas Star
Ink - Versamark
Paper - white cs
Size - A2
Accessories - Tim Holtz joy die, Ranger red embossing powder, Cuttlebug snowflake embossing folder, foam tape


Sunday, 13 August 2017

Yellow for Christmas

The August challenge from Christmas Cards All Year Round is to use yellow.  I'm entering this card:


I sponged with various dark yellows and yellow-browns to get the background. I stamped the trees in green. The snow is done with chunky white Frantage embossing enamel that I sprinkled over the card and heated from the underside.


Thanks for stopping by.  I'll be back tomorrow with some of the cards I did for SCS Dare to Get Dirty challenges.


Supplies:
Stamps - Tim Holtz trees, Impression Obsession sentiment
Ink - Memento Northern Pine, various Distress inks
Paper - white and mixed media cs
Size - A2
Accessories - Frantage chunky white embossing enamel, Memory Box Christmas star die, fun foam


Monday, 3 July 2017

Flag-related Christmas Card

Two current challenges relate to flags:

Less is More is asking for a card in your country's flag colour.

Jingle Belles is asking for a Christmas card using stars and / or stripes in honour of the USA July 4th holiday.

Since I'm Canadian, I went with red and white for our flag and just a star:


I used the large SU star, stamping it in my MISTI with red pigment ink (it took several reinkings and restampings to get solid coverage so thank goodness for the MISTI!), and then heat embossed with a sparkly embossing powder. I fussy cut it, scored the lines, and folded it.

The points are glued down to the cardbase and then there is foam tape under it. In the centre where it is raised higher off the card, I used a double layer of foam tape.

I used a very simple sentiment in keeping with "Less is More".

I'm also entering it in Christmas Cards All Year Round's current challenge of "Anything Goes".

I hope my Canadian friends enjoyed Canada Day, and wishing my American friends a happy 4th of July!


Supplies:
Stamps - SU Christmas Star, unknown joy
Ink - ColorBox red
Paper - white cs
Size - 4.75" square
Accessories - sparkly embossing powder, foam tape


Saturday, 4 March 2017

A Star for Happy Little Stampers

Another month flown by and it's already time for a new Happy Little Stampers' Christmas challenge!


I love stars on Christmas cards so definitely wanted to use the optional twist for my Design Team card.


I started with a spritz of homemade gold spray on my white cs, keeping it mostly in the top left corner.  I die cut a gold star and placed it over the sprayed area.  The sentiment is stamped in gold and the panel bordered in gold, then popped up on fun foam.

Come and join us at Happy Little Stampers' Christmas challenge for a chance at a prize:


You have until the end of March to enter.

I'm looking forward to seeing lots of cards using the optional twist of stars so that I can be inspired by you as well!

I'm also entering my card in this week's Merry Monday challenge "Shimmer and Sparkle".


Supplies:
Stamps - Impression Obsession "star of wonder"
Ink - Delicata Golden Glitz
Paper - white and gold cs
Size - A2
Accessories - Memory Box star of wonder die, homemade gold spray, fun foam


Monday, 15 February 2016

A Beautiful Colour Combination

This week's 52 Christmas Card Countdown is to make a card with blue, cream, and gold - love that colour combination!


I had a die cut gold Merry Christmas sitting in my extra pieces box so started with that. It works really well with the Rubbernecker winter trees stamp as the stamp has a flat bottom - perfect to edge with that sentiment die!

I inked up the stamp with two shades of blue ink, stamped on cream cs, added glue and glitter to the trees, and finished off with some die cut gold Christmas stars.

Thanks for dropping by!


Supplies:
Stamps: Rubbernecker
Paper: cream and gold cs
Paper Size: A2
Ink: Distress Faded Jeans and Chipped Sapphire
Accessories: Impression Obsession sentiment die, Memory Box star dies, Quickie glue pen, glitter, foam tape

Friday, 4 December 2015

A Star for Happy Little Stampers

It's time for the December challenge at Happy Little Stampers!  This month it is "Star".  I especially love stars as a Christmas card theme.  And I love the giant star stamp I chose to use for my card:


I love the way it is easy to score and bend and then put foam tape under it to get some real dimension.

I usually stamp it in gold but was feeling the need for something different so stamped it in a bright red, then sprayed it with Shimmer Spray (it's much more shimmery in real life!).  And also in real life, the red border is a much better colour match than it looks in the photo!

The background is splattered with a copper watercolour paint and the sentiment is heat embossed with a copper ep.  The copper border matches those.

Please come and join us at Happy Little Stampers.  You've got till the end of the month to link up your starry creations! 

Supplies:

Stamps: SU Christmas Star, Paper Smooches sentiment
Ink: Memento Lady Bug
Paper: white, red, and shimmery copper cs
Accessories: copper watercolour paint, copper embossing powder, foam tape, Tsukineko shimmer spritz


Tuesday, 25 August 2015

Gold and Vanilla

Today's Color Challenge on SCS is gold and vanilla - it immediately said Christmas card to me. And gold is so perfect for stars.  And I hold a Christmas card sale to fund raise for Southlands Therapeutic Riding Society, more commonly called STaRS, so I need some cards with stars on them for the sale. 


I stamped and heated embossed Gorgeous Grunge stamps and a sentiment for my base layer, and did the same with the Christmas Star stamp on a separate piece of cardstock. I fussy cut the star and scored and folded it for dimension. To keep the dimension, I put three layers of foam tape in the centre and two layers in the middle of each point, and then a bit of sookwang tape at the ends of each point.


Supplies:
Stamps: SU Christmas Star and Gorgeous Grunge, Wordsworth sentiment
Paper: Gina K ivory cs
Paper Size: A2
Ink: ColorBox Gold
Accessories: Stampendous detail gold embossing powder, foam tape