A blog devoted to the cards I make in my tiny upstairs space. When my sister stays there, she calls it an "artist's garret". I'm not an artist, but am an enthusiastic cardmaker - hence the title "Cardmaker's Garret".
___________________________________________________________________________________________

Tuesday 29 September 2020

Zooming with Perfect Pearls


I have a little blog hop for you today!  A few of us were doing a zoom craft session with Loll leading us in a few techniques for using our Perfect Pearls (mine were sitting much neglected in my craft cupboard).

First up we tried watercolouring die cuts with them.  

 
For this one, I painted the die cut poinsettia with nothing but Perfect Pearls - sprinkled a tiny bit on my craft mat, spritzed with water, and painted.
Added a heat embossed sentiment, a pale gold shimmer border, and some gemstones.
 
 
Next up, another die cut:
 

For this one, I tapped a green ink pad on my craft mat, sprinkled a bit of green Perfect Pearls onto it, then spritzed with a little water and blended them before painting the die cut.
I glued it to a die cut stitched rectangle, added a heat embossed sentiment, popped it up on fun foam, and embellished with red stick-on pearls.
 
My conclusion is that I prefer the second technique - by mixing the Perfect Pearls with some ink, I got a richer colour than was easier to paint on evenly.  The Perfect Pearls added great shimmer to the ink - I think you can see it a bit in the photo.  When using the Perfect Pearls alone, as on the poinsettia, I found it quite streaky and hard to blend.

Then we tried smooshing with them to create backgrounds.  I made some backgrounds on white mixed media and white watercolour but they were very similar to smooshing with inks or Magicals.  What I did find really intriguing was using the "interference" Perfect Pearls colours on black watercolour paper.  I got several really beautiful backgrounds from them.


This is blue interference Perfect Pearls - sprinkled on my craft mat, spritzed with water, and then I smooshed into it with black watercolour paper.  Hopefully you can see some of the shimmer in the photo.  I added the die cut reindeer, stamped the sentiment in a similar blue, and had the perfect shade of blue shimmer cardstock for the base.

Hop on over to the rest of the Zoom group to see their results:

Bonnie  https://bon2stamp.blogspot.com/2020/09/perfect-pearls-with-friends.html

Brenda  https://inkspiredtostamp.blogspot.com/2020/09/playing-with-perfect-pearls.html

Christine https://itsacarddaysnight.blogspot.com/2020/09/a-perfect-pearl-revival.html

Darnell  https://www.djkardkreations.com/2020/09/playing-with-pp.html

Loll  https://www.stampingwithloll.com/2020/09/zooming-with-friends-september.html


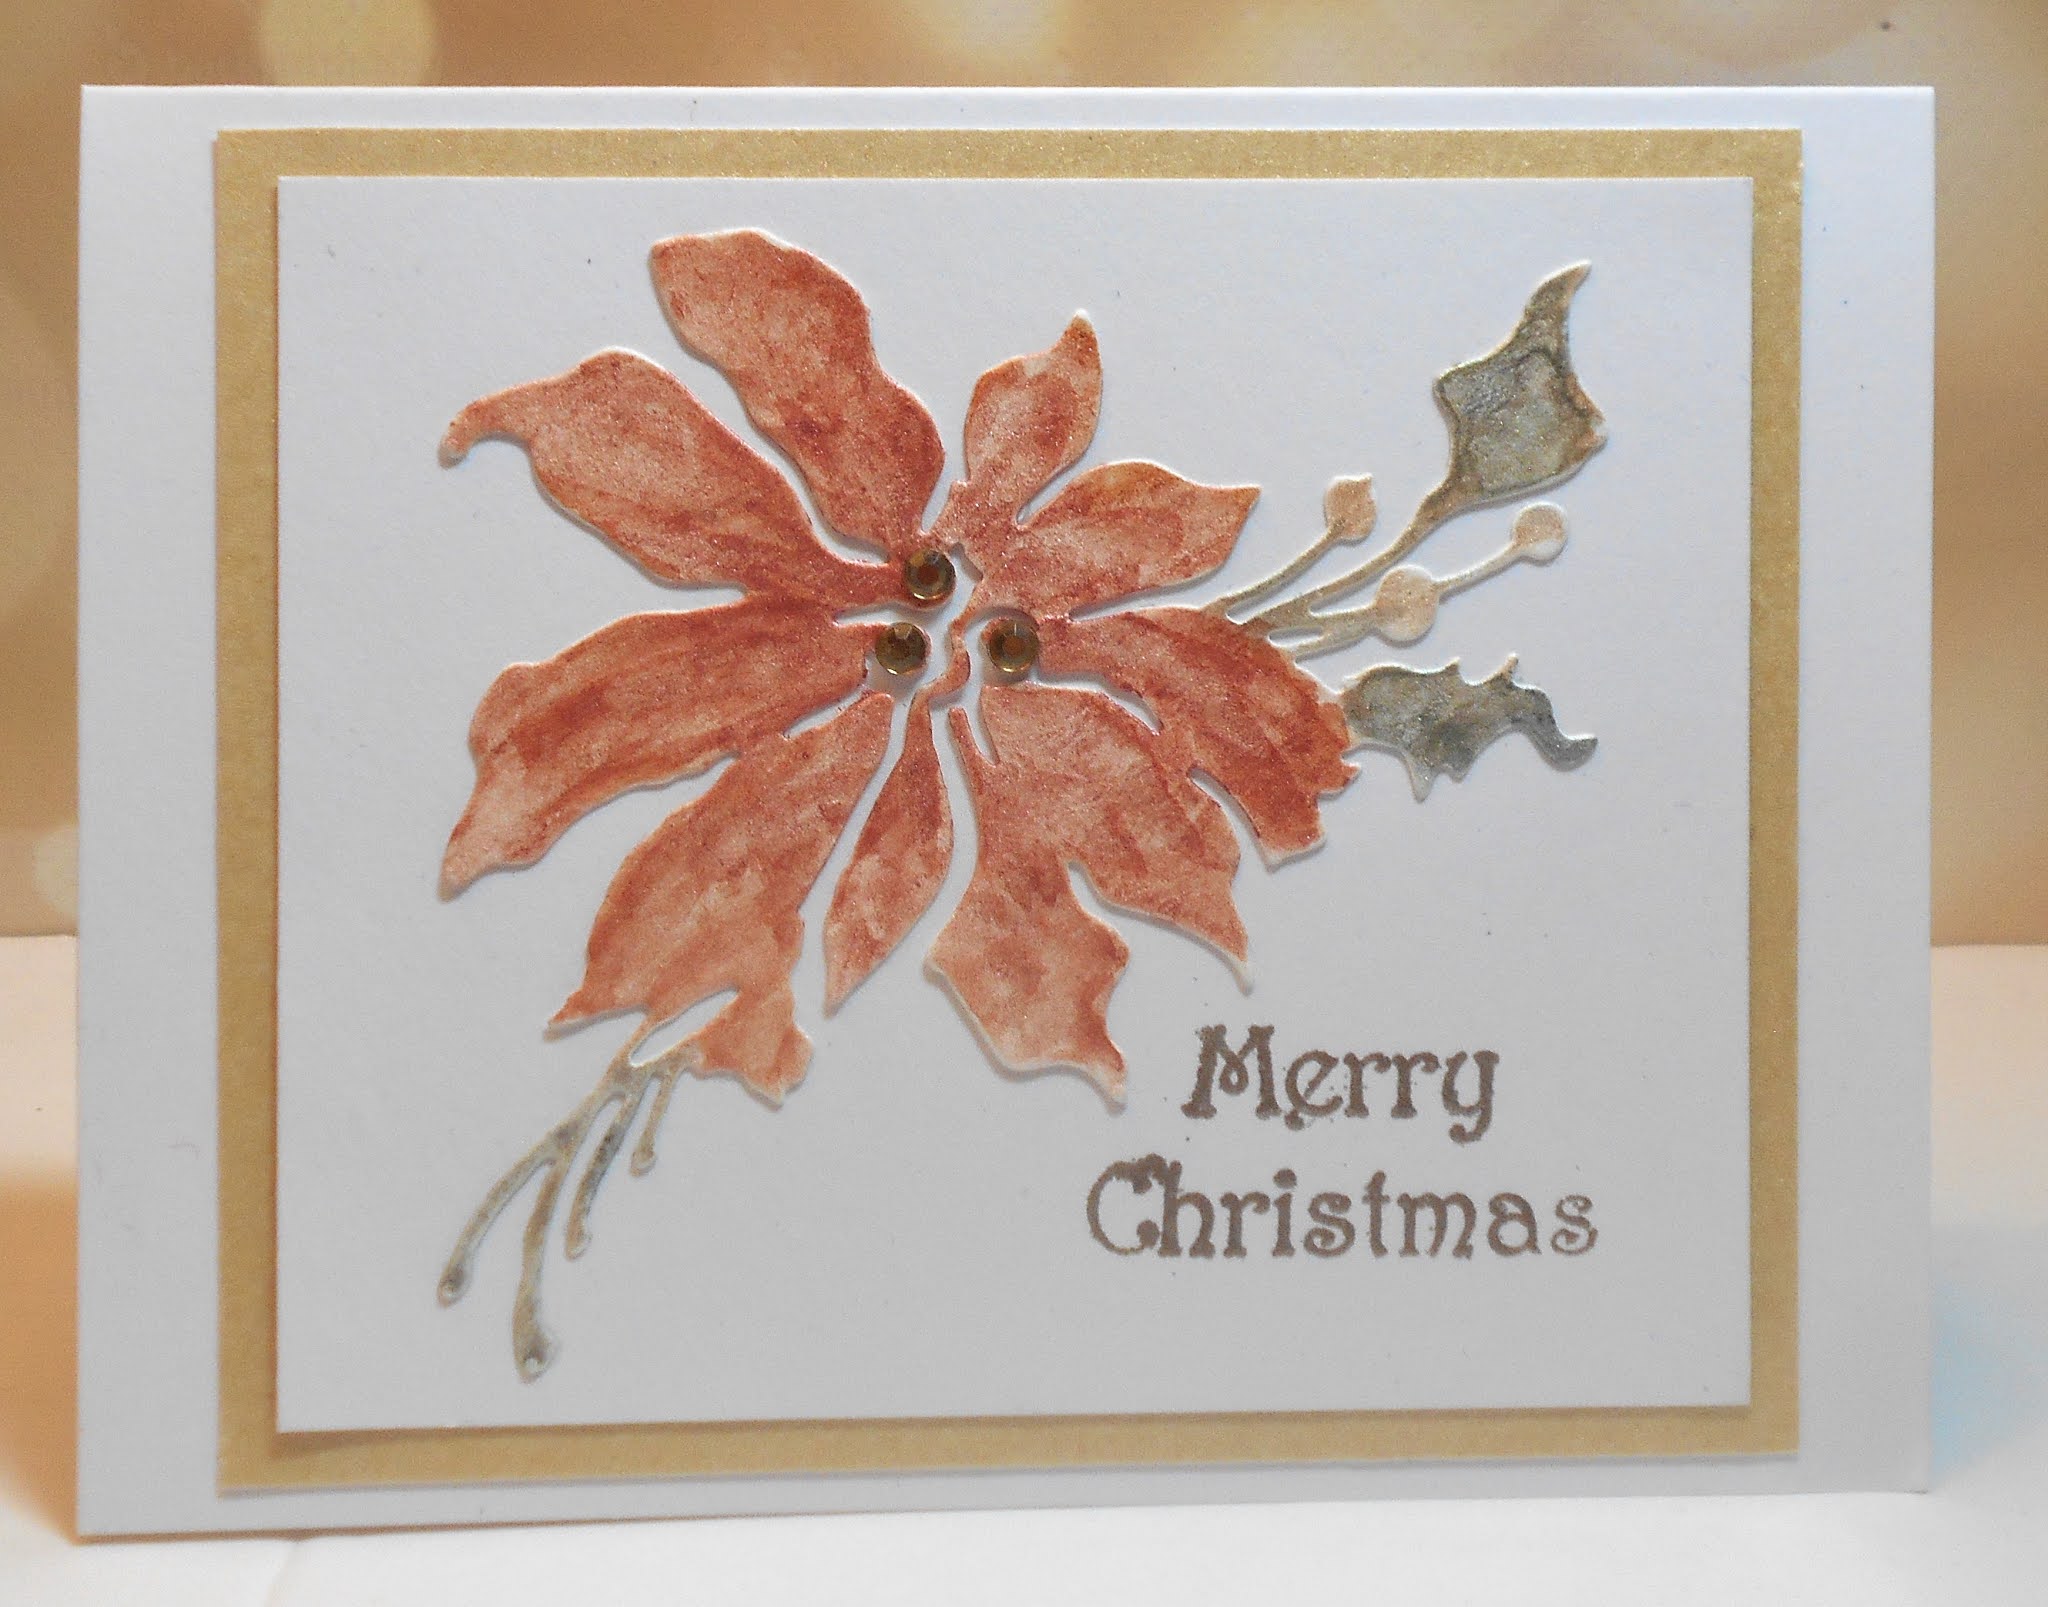
Supplies for card 1:
Stamps - Great Impressions sentiment
Ink - Versamark
Paper - white, mixed media, gold shimmer cs
Size - A2
Accessories - Penny Black poinsettia die, various colours of Perfect Pearls, champagne embossing powder, gold gemstones

Supplies for card 2:
Stamps - A Muse sentiment
Ink - Distress Pine Needles, ColorBox Cranberry
Paper - white cs, mixed media
Size - A2
Accessories - Penny Black holly die, green Perfect Pearls, clear embossing powder, Lil Inker stitched rectangle die, red pearls, fun foam

Supplies for card 3:
Stamps - Rubber Soul sentiment
Ink - Distress Blueprint Sketch
Paper - black watercolour paper, blue shimmer and white cs
Size - 4.25" square
Accessories - Memory Box reindeer die, blue interference Perfect Pearls, fun foam


Monday 21 September 2020

Die Cuts Only Birthday Card

Seize the Birthday is challenging us to make a birthday card using die cuts only (though we are allowed a stamped sentiment).

I went with an "out of my comfort zone" colour scheme, using a piece of a sprayed background out of my UFO box and some scraps of pink pieces.

If I recall, the background was made with various shades of green and blue sprays on mixed media cs.  While the sprays were still wet, I sprinkled on a bit of Magicals. Then I dug out some leftover pieces of pink background scraps (two were pink and mauve Distress ink smooshed on mixed media cs, and the other was pink Brushos sprinkled and spritzed on mixed media cs) and die cut the hollyhocks from them. Added them to my background, and then stamped the sentiment on a scrap of vellum and wrapped it around the panel, and popped it all up on fun foam on the card base.

Since it uses lots of scraps, I'm taking it over to Pixie's Snippets Playground.  I always love using up the pieces from my UFO box!


Supplies:
Stamps - unknown birthday sentiment
Ink - Archival Acorn, various Distress mauve and pink inks
Paper - pieces from my UFO box that used white cs, mixed media cs, vellum
Size - A2
Accessories - Impression Obsession hollyhock die, green and blue Magicals and sprays, pink Brushos, fun foam

Friday 18 September 2020

Dreaming of Travel

The Male Room wants us to make a card depicting where we'd like to travel if we could travel right now.  France, especially Paris, is one of my favourite places.


Here's my card:


I stamped the map background at a friend's house - don't remember the company so if anyone knows, let me know in the comments and I'll add it to my supplies list.

The focal image was created with various alcohol inks on Yupo. I then lifted the flourish image with Alcohol Ink Lift-off. The Eiffel Tower was stamped with Staz-on.

After assembling the card, I used a Tim Holtz rub-on arrow to point from the Eiffel Tower to Paris on the map.

How long do you think it will be before we feel comfortable getting on a plane and travelling somewhere?


Supplies:
Stamps - unknown map background, Tim Holtz Eiffel Tower and flourish
Ink - Staz-on black, Memento Tuxedo Black, various alcohol inks, Alcohol Ink Lift-off
Paper - cream and black cs, Yupo
Size - A2
Accessories - Tim Holtz rub-on arrow

Sunday 13 September 2020

A Thank You Card

Hello All,

You might have noticed I've been really absent from blogland lately, both posting and commenting.  Some of you already know this, but for my other followers, I thought I'd explain as I feel badly for not having done any commenting lately.  I had a heart attack in August and spent a week in the cardiac unit of the hospital.  I've been home for almost two weeks but have spent that time resting - a bit of reading, a bit of TV, and a lot of dozing.  I'm finally starting to feel a bit of energy for other things.  But forgive me if I still don't do much commenting - I figure it's enough of an accomplishment to make a card and post it for now.


One of my friends who has been making me dinners and keeping me company since I got home from the hospital loves owls so this card is for her.

I don't remember who made the owl stamp as I stamped it a while ago at a friend's house. It was sitting in my UFO box and this was the perfect opportunity to get it out. I watercoloured it using regular watercolours for the owl and a pearlescent one for the background around the owl, and then fussy cut it.

The background is a stencil embossed with a pearlescent paste. Popped it up on foam tape and added a die cut sentiment and matching border.

I'm adding it to the Color Throwdown Challenge:


Looking forward to getting more cards made and more posts written!


Supplies:
Stamps - Firecracker owl
Ink - Ranger Potting Soil
Paper - white and red cs, watercolour paper
Size - A2
Accessories - watercolour paints, Tim Holtz stencil, Dreamweaver Pearlescent paste, thank you die

Thursday 3 September 2020

Christmas Tree and Vellum Sky

Christmas is fast approaching and it's time to really work on those Christmas cards!  Collen is hosting CAS Christmas and is asking for Christmas trees this month.

I was looking through my paper stash and found a lovely piece of dark blue vellum with silver stars on it and decided to use it as a background for my Christmas tree.

I stamped and heat embossed the sentiment and die cut a circle in my top panel and attached the vellum to the back of it and then popped it up on foam tape - in real life the delicacy of the vellum is more appealing than in the photo.

I die cut the tree three times and glued them together for dimension.  After adding it to the card, I die cut a small silver star to add to the top of the tree.

Please come and join us with your CAS cards featuring a Christmas tree.  You have until September 24th to link up.  There is lots of inspiration from the rest of the Design Team and this month's Guest Designer, Steph (My Paper Corner) over at CAS Christmas.


Supplies:
Stamps - Rubber Soul sentiment
Ink - ColorBox Royal Blue
Paper - white cs, dark blue vellum printed with silver stars
Size - A2
Accessories - unknown Christmas tree die, small star die, Spellbinders circle die, clear embossing powder, foam tape