A blog devoted to the cards I make in my tiny upstairs space. When my sister stays there, she calls it an "artist's garret". I'm not an artist, but am an enthusiastic cardmaker - hence the title "Cardmaker's Garret".
___________________________________________________________________________________________

Saturday 30 January 2021

Christmas Birds in a Row

One of my favourite themes for Christmas cards is birds.  So I pulled out a rarely-used bird stamp from my excessively large collection of bird stamps.


A very CAS card - stamped, watercoloured, bordered with a bit of copper shimmer cs, and popped up on fun foam.

I'm linking it up with two challenges:

Less is More "In a Row"

Christmas Cards All Year Round "Something that Starts with A or B" - I have birds.


Supplies:
Stamps - Crafty Individuals
Ink - Archival Jet Black
Paper - watercolour paper, cream and copper cs
Size - A2
Accessories - watercolour paints, fun foam

Wednesday 27 January 2021

Horses in the Woods

Since The Male Room challenge is asking for "Animals" this time, I'm indulging my love of horses for today's card.


I followed Loll Thompson's video "Stencilling with Brushos" and created my background with the birch tree stencil and black Brushos (love all the colours the black Brushos give you).

I stamped the horses on the background in black ink and heat embossed with clear embossing powder. I used a Versamarker pen to scribble in the "ground" and then heat embossed it with a mixture of different green embossing powders.

I trimmed the panel, bordered with black cs, popped it up on fun foam, and added Tim Holtz clippings stickers in place of a sentiment.


Supplies:
Stamps - Local King Rubber Stamp horses
Ink - Versafine Onyx Black, Versamarker pen
Paper - cream and black cs, watercolour paper
Size - A2
Accessories - black Brushos, clear embossing powder, a mix of green embossing powders, TCW stencil, fun foam, TH clippings stickers sentiment stickers

Sunday 24 January 2021

White Embossed Flowers

I have a huge stash of decorative papers but I would so much rather make interesting backgrounds myself than try to use up that dp!  Here's a card using a background that I learned from this video.


I used blue and green watercolour paints on black cs, just dabbing them on randomly, spritzed with a bit of water to get them to flow more, and dried. I splattered a little bit of the paint and dried again.

Then stamped the grid / text stamp over it just in white ink. When the ink was dry, I put it in my MISTI and stamped and heat embossed the flowers in white. It's a good example of how much more vibrant heat embossing with white embossing powder makes the white ink than just stamping it without heat embossing.  I trimmed the panel down and mounted it on fun foam.

I die cut the sentiment out of the leftover bit of background. When I glued it on, I didn't get it as centred as I wanted so punched three tiny dots and added them after the sentiment. They will lead into what I write on the inside.

I'm adding this card to The Flower Challenge "Embossing Heat or Dry".


Supplies:
Stamps - Jofy flowers. Lime Citron grid/text
Ink - ColorBox white
Paper - black and white cs
Size - A2
Accessories - blue and green watercolour paints, white embossing powder, Lil Inkers thank you die, fun foam

Saturday 23 January 2021

Splatters and a Star

I am trying to use some of my older SU stamps in order to decide if I'll keep them or not.  This Christmas star is very versatile so it's definitely going into the "keeper" pile.


I sprayed and splattered the background with gold and copper sprays. For the splattering, I took the top off the container and tapped the tube against a ruler.  I used FlitterGlu and gilding flakes on the star stamp (instead of heat embossing it like I normally do with this stamp) and then fussy cut it, scored it, folded it, and popped it up with foam tape. I put the sentiment on a die cut label.

I'm linking it up at the CAS Mix Up Challenge "Splatters".  I've more than covered off the mixed media requirements - I've got stamping, sprays, splatters, gilding flakes, fussy cutting, scoring, and die cutting!


Supplies:
Stamps - SU Christmas Star, unknown sentiment
Ink - Delicata copper
Paper - white cs
Size - 4.75" square
Accessories - copper and gold sprays, gilding flakes, FlitterGlu, foam tape, Spellbinders label die

Tuesday 19 January 2021

Three Shades of Blue

Those of you who know me well know that blue is definitely my favourite colour.  Here are some gorgeous shades of blue:


I created an alcohol ink background on Yupo and let it dry. I then placed the wildflower stencil over top and using a small sponge dauber, dipped into blending solution, blotted off the excess blending solution, and then pounced the dauber over the stencil to remove colour. Make sure all areas are done before removing stencil. I didn't get a very good impression of the stenciled flowers so replaced the cleaned and dried stencil and went around the openings in the stencil with a fine blue marker to give them definition.

I did a heat embossed sentiment on a scrap of vellum, die cut a wildflower out of a scrap of cs, wrapped the vellum around the panel, and bordered in a leftover bit of navy cs before adding it to a white card base.

Off it goes to these challenges:

Just Us Girls "Three Shades of Blue Colour Challenge"

AAA Birthday "A Stencil Background"
 

Pixie's Snippets Playground Challenge #394 


Supplies:
Stamps - SU sentiment
Ink - ColorBox white
Paper - white and navy cs, vellum, Yupo
Size - A2
Accessories - white embossing powder, blue fine line marker, various blue alcohol inks, alcohol ink blending solution, Tim Holtz wildflower stencil and die

Sunday 17 January 2021

A Snowflake on a Toilet Paper Background

It seems scandalous to be using toilet paper as part of a greeting card, given the shortage of it that we saw when Covid first started!  But I had great fun learning a new technique that involved several sheets of it to create an embossed background.


I layered 5 squares of toilet paper, misting with water in between each one and again on the top layer.  I placed it inside a snowflake embossing folder and ran it through my Cuttlebug.

Once the toilet paper was dry, I trimmed it to fit behind a silver glitter die cut frame and added a silver glitter die cut snowflake to the centre.

The embossed toilet paper has a wonderful feel of homemade paper.  For more ideas for using it, see this video and this tutorial.

I'm linking it up at these challenges:

Addicted to CAS "Code Word: Snow"


Cardz for Guyz "Let It Snow"

The Paper Players "CAS Challenge: Snow.............."

Thanks for stopping by today!


Supplies:
Paper - silver glitter cs, white cs, toilet paper
Size - 4.75" square
Accessories - snowflake embossing folder, square frame die, snowflake die

Friday 15 January 2021

Silhouette Skaters

It's time to remind you to enter CAS Christmas's January challenge "Silhouette".  Here's my reminder card:

Loll taught me how to do Eileen Godwin's great technique of creating a geometric sponged background with some stencilling over it - perfect for a silhouette stamp.

Check out Eileen's video here.

I created the geometric pattern with pale wintery shades of blue and lilac Distress inks, then stencilled some snowflakes over it.  I put it in the MISTI and stamped the image of children skating and the sentiment.

Then popped it up on fun foam over an angled scrap of black cs to reflect the angles of the geometric background.

You've got until January 24th to link up a clean and simple Christmas card featuring a silhouette.  There's more inspiration from the Design Team over at CAS Christmas.

I know Christmas is only just over, but it's never too early to start making them for next year!


Supplies:
Stamps - Impression Obsession skaters, SSS sentiment
Ink - Versafine Clair Nocture, Distress Weathered Wood, Shaded Lilac, Victorian Velvet, Stormy Sky
Paper - white and black cs
Size - A2
Accessories - Carta Bella snowflake stencil, fun foam

Monday 11 January 2021

Twofer Snowdrops

I don't very often do my friend, Darnell's Twofer Challenge as my brain doesn't seem to want to come up with two very different designs for two different occasions using the same stamp at the same time.  But this month it is "Flowers" and, while I was making a belated birthday card for a friend yesterday, my brain decided that it did have an idea for using the same stamp differently.  Here are the two cards:


The one on the left is a card to celebrate spring, the one on the right is the belated birthday card (people really shouldn't have birthdays in early January - it's just too darn close to Christmas!).

I made the birthday one first:


It's for a friend who loves birds and is a keen gardener.  Last year she asked me to split up some of my clumps of snowdrops so that she could get them growing in her garden so this seems the perfect image for her January birthday - my snowdrops are already poking their heads up in my garden.

Very simple to make - stamped, watercoloured, trimmed, bordered with green shimmer cs to match the snowdrop leaves, and embellished with some glitter on the snowy bits of the image.

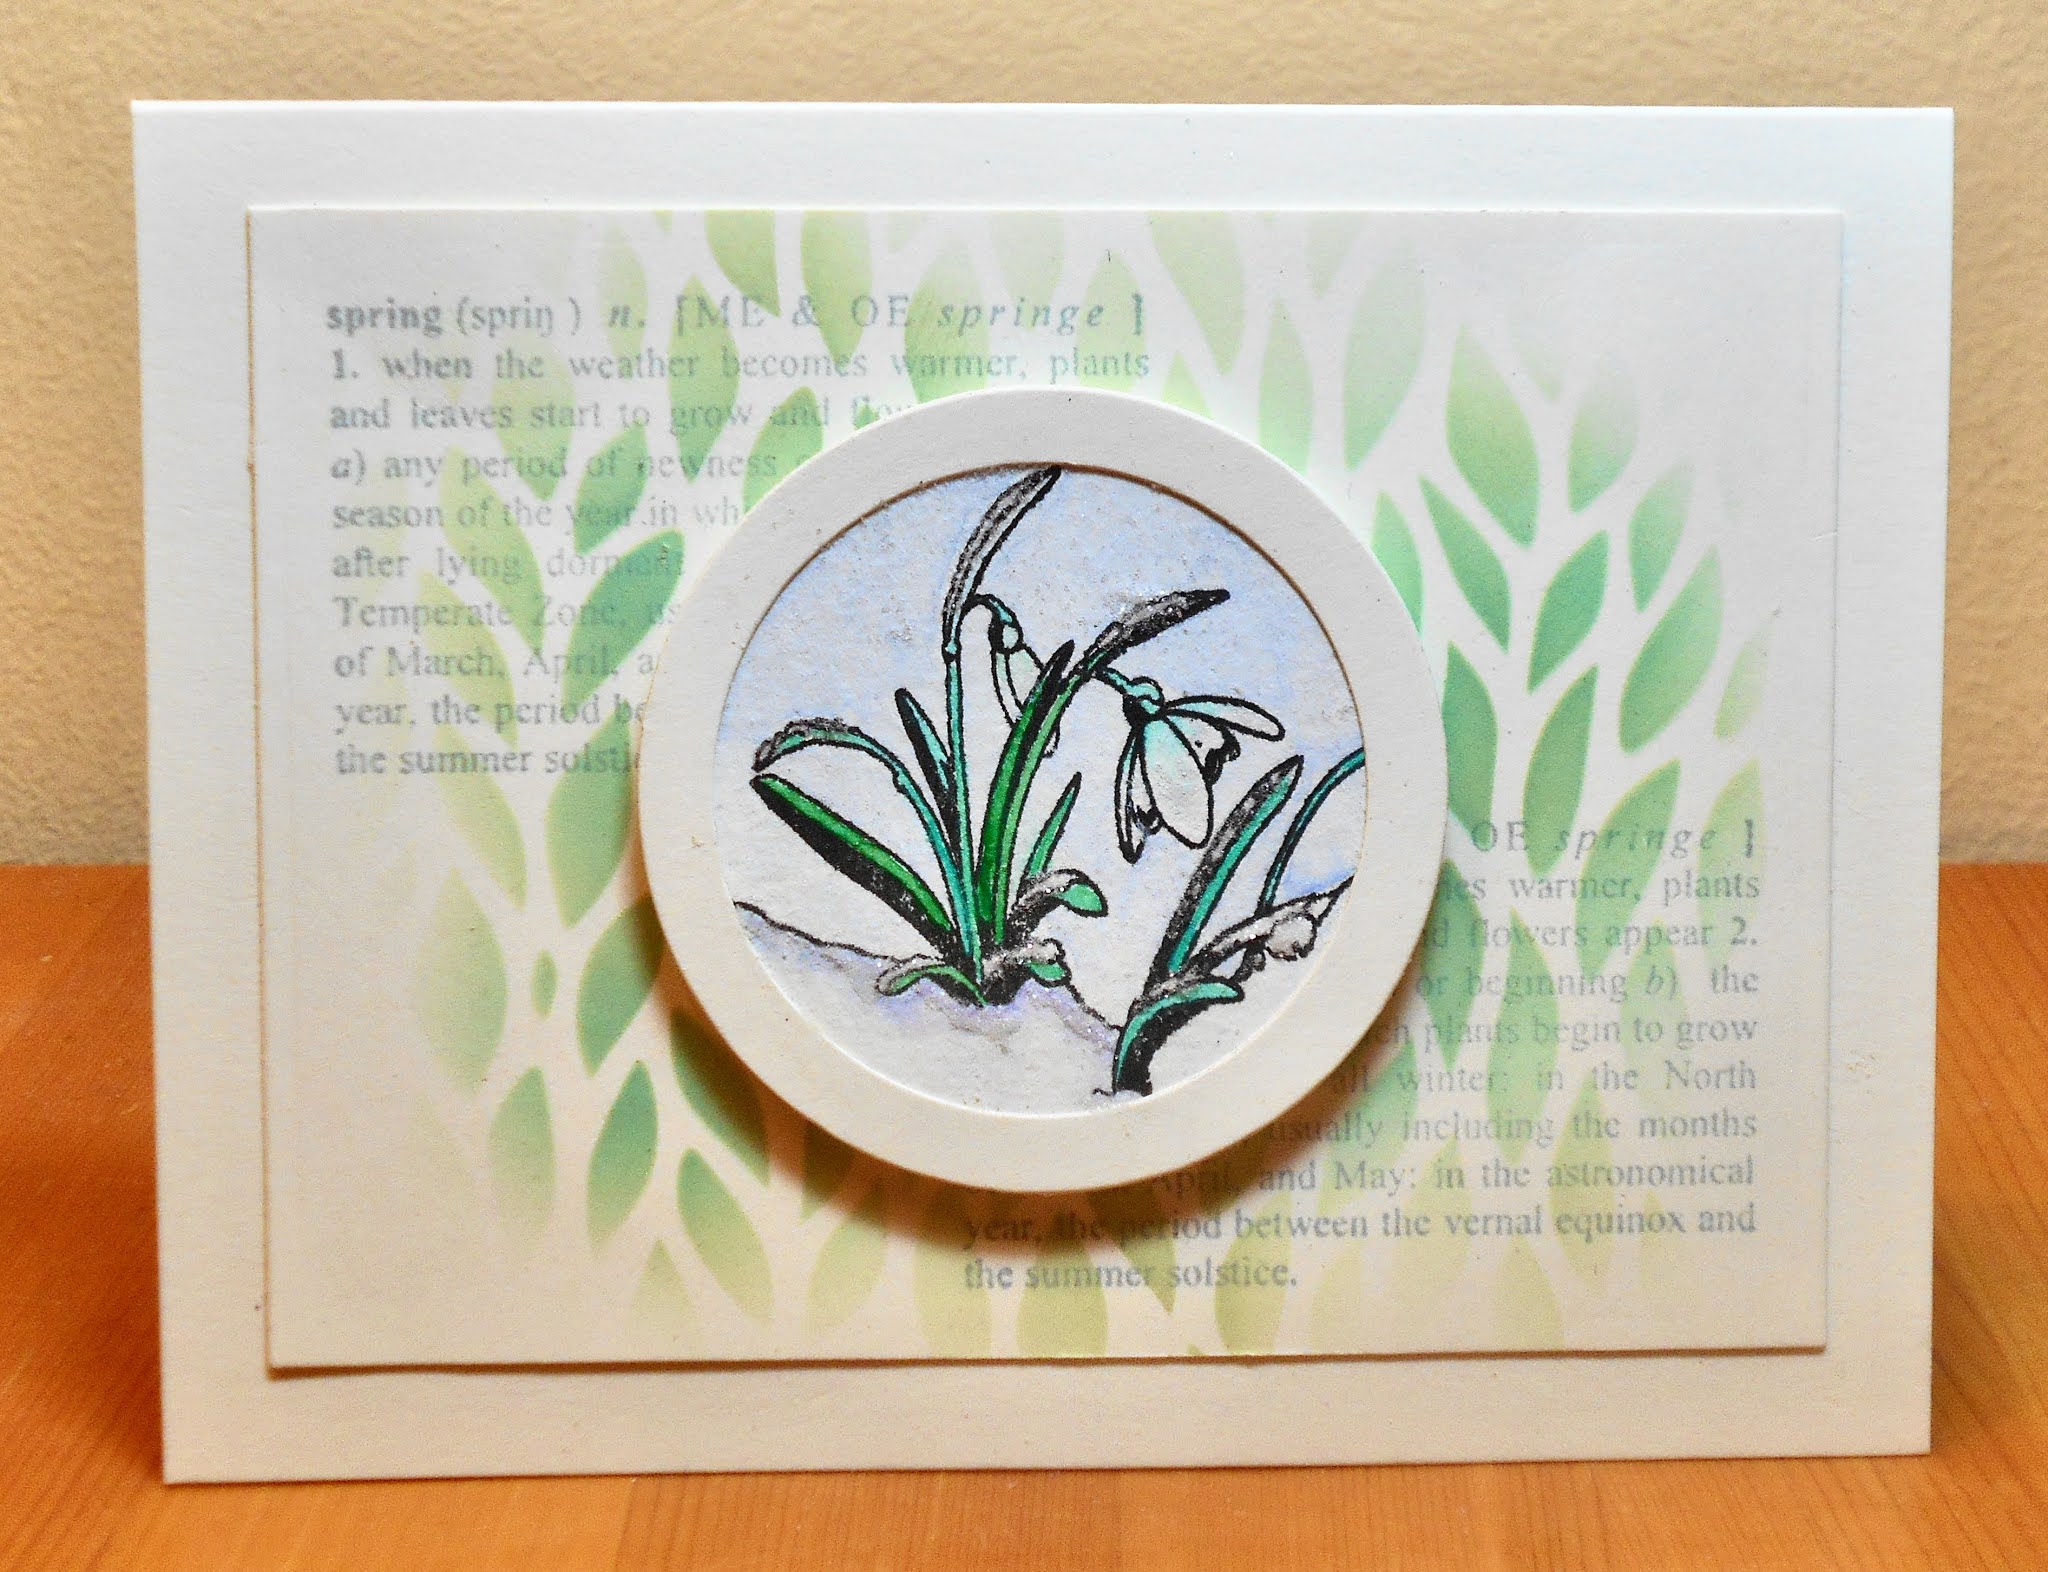
The Twofer uses just the snowdrops part of the stamp:


For this one, I restamped part of the image and watercoloured, then die cut it into a circle, and die cut a circular frame from the same cs as the rest of the card.  I stencilled the background leaves in two shades of green Distress Oxide ink and stamped a definition of spring over it.  And added glitter to the snowy bits of the image.

Thank you, Darnell, for getting my brain to come up with a Twofer this month by giving it a theme that it likes!!!

Twofer Card Challenge "Flowers"   


I'm also adding it to Seize the Birthday "Snowy Background".


Supplies:
Stamps - Penny Black robin and snowdrops stamp, SU birthday sentiment, Purple Onion spring stamp
Ink - Archival Jet Black, Distress Oxide Bundled Sage and Evergreen Bough, Memento London Fog
Paper - watercolour paper, white cs, cream cs, green shimmer cs
Size - A2
Accessories - watercolour paints, glitter, Spellbinders circle dies, Dina Wakely leaf stencil


Saturday 9 January 2021

For a Goth Wedding

A friend asked me to make a card for her nephew's wedding - it's going to be very "Goth" in style (hard to imagine) so I came up with this:


There needed to be black in the card for sure so I used a black card base, layered a silver heart and sentiment on top, cut a white background for the heart and added little die cut black vines to the inside of the heart.

I'm linking it up with the Cardz for Guyz "Black / Silver or Black / Gold" challenge.

What do you think a Goth wedding will look like?


Supplies:
Paper - black and white cs, silver mirri cs
Size - A2
Accessories - TH "love" die, heart die, Spellbinders leafy vines die

Wednesday 6 January 2021

A Vintage Owl

I'm honoured to be the January Guest Designer over at Day of the Month Card Club Challenge.  The theme is "National Bird Day".  I used a brand new stamp and made a Christmas card with it.

I stamped the owl in my MISTI, using Distress ... on watercolour paper, then used a wet paintbrush to drag some of the colour out of the stamping.  I used a dark red marker on the berries and stamped the sentiment in dark red.  Some sponging and splattering around the edge of the panel gave it a vintage look.  I matted with dark red cs and popped it up on fun foam on a rustic cs card base.

Please come and join us at The Day of the Month Card Club Challenge.  The only requirement is to use the theme of National Bird Day and link up your card by January 31st.


Supplies:
Stamps - Crafty Individuals, Rubber Soul sentiment
Ink - Memento Rhubarb Stalk;  Distress Oxide Antique Linen and
Paper - watercolour paper, dark red cs, rustic cream cs
Size - A2
Accessories - dark red marker, fun foam


Sunday 3 January 2021

Tiny Reindeer Silhouette

Welcome to the first CAS Christmas Challenge of the new year.  Here's hoping 2021 is a better year for all of us.

This month's host is Julia and she would like us to use Silhouettes.

I wanted to keep it really CAS so used a very small image.  I pulled out a small leftover piece of background and started with that.


I think the scrap was made by smooshing with Oxide inks.  It was the perfect size for the small reindeer die.  I used the sentiment to ground him, then popped it up on fun foam on an embossed background.

We'd love to have you join us at CAS Christmas.  For more inspiration, check out the cards by our fabulous Guest Designer, Pat (Colourful Card Creations) and the rest of the Design Team.


Supplies:
Stamps - A Muse sentiment
Ink - various blue Oxide inks
Paper - white cs, scrap of background
Size - A2
Accessories - small reindeer die, Cuttlebug embossing folder, SU label punch, fun foam