A blog devoted to the cards I make in my tiny upstairs space. When my sister stays there, she calls it an "artist's garret". I'm not an artist, but am an enthusiastic cardmaker - hence the title "Cardmaker's Garret".
___________________________________________________________________________________________
Showing posts with label frantage. Show all posts

Friday, 24 November 2023

A Squirrel for Autumn and a Winter Landscape

It seems I'm often sneaking in under the wire for challenges!  Here I go again with two cards.

First up, for The Four Seasons Fall challenge, I was totally inspired by the sweet little squirrel in the bottom right image on their mood board (see below).


I stamped the squirrel on watercolour paper and then again on masking paper - fussy cut the mask and laid it over the squirrel on the watercolour paper. I then stamped the berry branches over the squirrel. Watercoloured, trimmed the panel, bordered with black, added to a cream card base, and went over the berries with Glossy Accents.

I'm sending it to my sister - she's moving and said one of the little things she'll miss (hence the sentiment) is the antics of the squirrels at her present house.

Next up, for Cardz 4 Guyz "A Winter Scene" and 52 Christmas Card Throwdown "Winter Countryside":

I stamped the image, coloured the buildings and trees with alcohol markers, sponged the sky with pearlescent ice blue ink, sprinkled with chunky white embossing powder and heated it from underneath to create the falling snow, and popped the panel up on fun foam on a dark green card base.

  Cardz 4 Guyz Logo 


Supplies for card 1:
Stamps - ArtSpecially squirrel, Penny Black berries, Chocolate Baroque sentiment
Ink - Versafine Onyx Black
Paper - watercolour paper, black and cream cs
Size - A2
Accessories - watercolour paints, Glossy Accents, masking paper

Supplies for card 2:
Stamps - Serendipity Winter Farm, SSS sentimen
Ink - Versafine Clair Nocturne, Brilliance Pearlescent Ice Blue,
Paper - mixed media cs, dark green cs
Size - A2
Accessories - alcohol markers, Stampendous Frantage Chunky White embossing powder, fun foam

Wednesday, 6 September 2023

A CAS Robin and a Reindeer in a Winter Scene

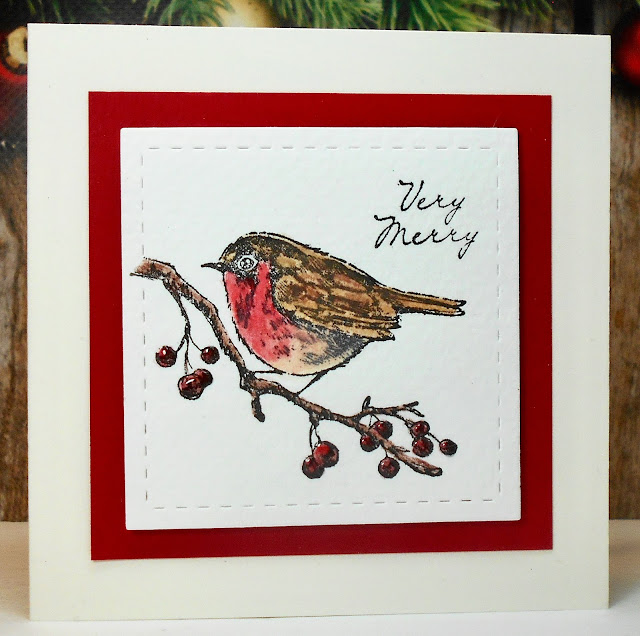
Another Christmas twofer!  For the ABC Christmas Challenge "Q for Quick and R for Robin" and for Christmas Card Creations "CAS":


Definitely a quick CAS card - stamped and watercoloured, trimmed with a stitched square die, bordered with red, and added to the card base.  I finished off by adding Glossy Accents to the berries.

My second card is for The Sisterhood of Crafters "Make a Scene" and Shopping Our Stash "Any Wild Animal".  My wild animal is a reindeer and I've created a winter scene.


I tore several strips of scrap paper to use as masks.  Then starting at the bottom of my cs, I laid one of the strips down and did the first sponging of ink, and then moving up the card, did each successive layer, changing to blue once I got to the sky. Once my background was dry, I stamped the reindeer, trees, and sentiment. Then once they were dry, I sprinkled chunky white Frantage and heated it from the underneath so it wouldn't blow away - a great way to create snowfall.

Please Grab Our Badge!  Grab Our Badge!


Supplies for card 1:
Stamps - Inkadinkado bird, Impression Obsession sentiment
Ink - Versafine Onyx Black
Paper - watercolour paper, red and cream cs
Size - 4.25" square
Accessories - watercolour paints, Lil Inker stitched square die, Glossy Accents

Supplies for card 2:
Stamps - Tim Holtz
Ink - various blue Distress inks, Versafine Clair black
Paper - white cs
Size - A2
Accessories - Frantage Chunky White Embossing Enamel

Monday, 27 March 2023

A Threefer!

I don't very often post three cards at once but I'm trying to get a few challenges done and I had plenty of time to craft on the weekend.

First up for Stamping Sensations ("things with wings") and Once Upon a Time ("Harold and the Purple Crayon"):


I chose the colour combination from the Once Upon a Time challenge book cover:


I sprinkled blue and purple Brushos on mixed media cs and spritzed with water.  The stamped the butterfly collage over it. The Brushos made some nice shades of colour so I chose similar pink and blue sprays to use on the background. Once the sprays were dry, I stamped the background with a small font script stamp.

Next for My Time to Craft Christmas ("something starting with R"), I went with a reindeer and for Christmas Cards All Year Round ("3 of something"), I went with 3 trees:


I used a technique I learned from Karen Dunbrook of tearing many strips of scrap paper to use as masks, starting at the bottom with the first sponging of ink, and then moving up the card. Once my background was dry, I stamped my images and sentiment. Then once they were dry, I sprinkled chunky white Frantage and White Diamond embossing powder over the panel, and heated it from underneath so it wouldn't blow away - a great way to create snowfall.

And finally for Sweet Stampin' Challenge ("spring or Easter"), I went with spring and for Cardz 4 Galz "Spring Flowers" and My Time to Craft Challenge "Springtime":


I watercoloured the image, trimmed it, and popped it up on fun foam on a dry embossed panel.

Challenges:

Stamping Sensations - things with wings

Once Upon a Time - Harold and the Purple Crayon

Christmas Cards All Year Round  - 3 of something

My Time to Craft Christmas - something starting with R

Sweet Stampin' Challenge - spring or Easter

Cardz 4 Galz - spring flowers 

My Time to Craft - springtime 


Supplies for card 1:
Stamps - Hampton Art Windowpane Monarch, unknown script stamp
Ink - Archival Jet Black
Paper - mixed media and cream cs
Size - A2
Accessories - various pink and blue sprays, blue and purple Brushos

Supplies for card 2:
Stamps - Tim Holtz
Ink - various blue Distress inks, Versafine Clair Nocturne
Paper - white cs
Size - A2
Accessories - Frantage Chunky White Embossing Enamel, Judikins White Diamond embossing powder

Supplies for card 3:
Stamps - Stamplorations tulips, Rosie's Roadshow sentiment
Ink - Versafine Onyx Black
Paper - watercolour paper, white linen cs
Size - A2
Accessories - watercolour paints, SU embossing folder


Sunday, 24 April 2022

Snowy Cardinals and Snowy Postcard

Two Christmas cards today.  First of all for Christmas Cards All Year Round "Red and Green with Circles", I used inverted scallop circle dies for this card:


The cardinals and leaves are watercoloured, and the snow has glitter on it. 

Today's other card is for Double D Challenge "Show a Building on your Project" and for We Love Stamping "Favourite Stamps".  Like the Santa Horses card I posted a few days ago, I love the Snowy Postcard stamp so much I've bought a spare in case this one wears out.

I watercoloured the image inside the oval and sponged Antique Linen around the edges and up to the oval, and then darkened the outer edges with Brushed Corduroy.  I went over the roofs and the fence tops with a Quickie glue pen and added glitter.  I sprinkled white chunky Frantage over the image and heated it from underneath so it wouldn't blow off.


Supplies:
Stamps - Serendipity cardinals, Penny Black sentiment
Ink - Versafine Clair Nocturne
Paper - watercolour paper, green and red cs
Size - 4.75" square
Accessories - watercolour paints, Spellbinders inverted scallop circles, Quickie glue pen, glitter

Supplies for card 2:
Stamps - Stampendous Snowy Postcard
Ink - Versafine Onyx Black, Distress Antique Linen and Brushed Corduroy
Paper - watercolour paper, linen cs
Size - A2
Accessories - watercolour paints, glitter, Frantage embossing powder, fun foam

Thursday, 24 February 2022

Polar Bears, a Cabin, and a Sentiment

The month is flying by and I've got some challenges I want to enter.

First up, did you know there was such a thing as Polar Bear Day?  Well there is, and part of the reason is to draw attention to the world's largest carnivore and the threat of extinction facing it.  The Day of the Month Card Club Challenge chose it for its February challenge.  And polar bears are perfect for the Paper Players wildlife challenge.


Stamped and watercoloured, then trimmed and put on a gold shimmer panel that has "merry" die cut out of it.

Moving on to Christmas Cards All Year Round where they want to see a cabin or cottage.

I kept it simple to let this lovely detailed image take centre stage.  Stamped in navy, trimmed and bordered with navy cs, and glitter added to all the snowy places.  In real life, it's lovely and sparkly.

And finally, a chance to use up a strange piece of background from my UFO box.  The Christmas Kickstart Challenge wants the sentiment to take centre stage.

I don't know what I was thinking when I made this background - I sprayed some gold spray on navy cs, then scrunched up some cling wrap on top and let it dry.  Then added two types of Frantage embossing powder (one with chunky white bits, one with smaller white and gold bits) and heat embossed from underneath.  I was going to toss it and then decided to try using it for this challenge with just a gold die cut sentiment and a few die cut gold stars.  To add a bit more interest (as if there wasn't enough going on already), I die cut the navy panel with a hemstitch rectangle and layered it over a gold card base to co-ordinate with the sentiment and stars.  So what's the verdict - a hot mess (as Jennifer McGuire likes to say) or a passable attempt at mixed media?  Believe me, you won't hurt my feelings as I'm quite ambivalent about this one!

Challenges:

Day of the Month Card Club Challenge - "Polar Bear Day"


The Paper Players - "Wild about Wildlife"


Christmas Cards All Year Round - "Cabin / Cottage"

Christmas Kickstart Challenge - "The Sentiment Takes Centre Stage"


Supplies for card 1:
Stamps - Penny Black
Ink - Archival Jet Black
Paper - watercolour paper, gold shimmer and cream cs
Size - A2
Accessories - watercolour paints, TH merry die

Supplies for card 2:
Stamps - Crafty Individuals cabin, Penny Black sentiment
Ink - Versafine Clair Twilight
Paper - white and navy cs
Size - A2
Accessories - glitter

Supplies for card 3:
Paper - navy and gold cs
Size - A2
Accessories - gold spray, cling wrap, Stampendous Frantage embossing powders, Spellbinders hemstitch rectangle die, Memory Box star dies, Penny Black sentiment die

Saturday, 30 October 2021

Sleigh in Two Sizes

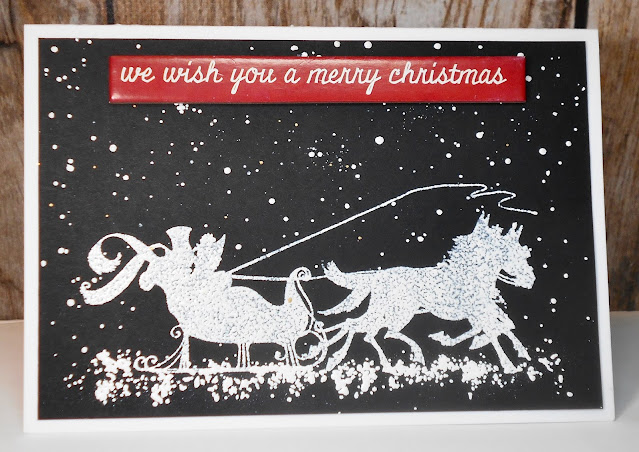
A few years back I bought both Tim Holtz stamp sets that included the horse drawn sleigh as I couldn't decide which size I liked the best.  Today I'm posting cards using both sizes of the stamp.  The cards are slightly different sizes but are both 6" across so you can see the different sizes in the stamps.

First up the bigger version of the stamp:


This is an A6 card, slightly larger than the A2 I usually make.  I stamped and heat embossed the image in white on black cs. Then scattered Frantage chunky embossing powder randomly over the panel and heated it from underneath so that it wouldn't blow away. For the snowy ground, I scribbled with a Versamark pen and then added Frantage to that and heated it. Instead of stamping a sentiment, I used one of the Tim Holtz Christmas quote strips I bought ages ago but have never used!

The second card is similar but uses the smaller version of the stamp and is a mini slimline size. 


Same technique but I added a white heat embossed sentiment that came in the same stamp set.

Challenges:

Card 1:

Christmas Craft Creations - Black & White + One Other Colour

Jingle Belles - Use an Animal on a Holiday Card

Christmas Cards All Year Round - Something that Starts with S or T - I have S for Sleigh

Card 2:

The Male Room - A Black and White Masculine Card


Supplies:
Stamps - Tim Holtz
Ink - ColorBox White
Paper - black and white cs
Size - Card 1 - A6 (6x4.25"), Card 2 - mini slimline (6x3.25")
Accessories - white embossing powder, Stampendous Frantage chunky white embossing powder, Versamark pen, red Tim Holtz Christmas quote strip (card 1)

Thursday, 3 June 2021

Snowman in a Circle

It's time for the June CAS Christmas challenge.  And Hideko is asking us to make cards featuring a snowman - one of my favourite themes!

I stamped the image with Versafine ink, let it dry, and then watercoloured the scarf with my Gansai Tambi paints and the shading and snowy ground with a blue metallic paint.  

I trimmed the panel with a circle die cut, sprinkled with Frantage Chunky White embossing powder, and heated it from underneath so that the grains of embossing powder wouldn't blow off before melting.

I then bordered the circle with a mottled blue-grey cs, popped it up on fun foam on the card base, and added a sentiment die cut from the same mottled cs.

Here's a close-up of the Frantage Chunky White embossing powder - it makes fabulous snow:


It may seem funny to think about snowmen in June when summer is well underway but you'll be glad come November when you have those cards made, ready for mailing.  So please join us before June 24th with your CAS snowmen cards.  For more inspiration, check out the cards by the CAS Christmas Design Team and this month's wonderful Guest Designer, Steph (My Paper Corner).


Supplies:
Stamps - Inkadinkado snowman
Ink - Versafine Onyx Black
Paper - watercolour paper, mottled blue/grey cs, ivory cs
Size - 5" square
Accessories - Gansai Tambi watercolour paints, metallic blue watercolour paint, Tattered Lace sentiment die, Spellbinders circle die, Lil Inker stitched circle die, Stampendous Frantage Chunky White embossing powder, fun foam

Thursday, 14 March 2019

White and Gold

I've done some more playing with the "encrusted jewels" technique, and put two pieces together for this card:


To make the tree and star, I die cut them out of thin chipboard, then placed them on a warm grill on top of a layer of non-stick craft mat then parchment paper.  I sprinkled them with gold embossing powders.  Once they had melted, I added multi-coloured chunky glitter pieces on top.  The melted embossing powders hold the glitter in place.  To finish it off, I melted UTEE (Ultra Thick Embossing Enamel) on top.  I then die cut the same two dies from fun foam and attached them immediately to the encrusted star and branch to give them a bit more body so that they wouldn't bend and crack.

I stamped and heat embossed my sentiment, scattered some Frantage Shabby White on the focal panel and heat embossed it from underneath,  then attached my two encrusted jewel pieces, and popped the panel up on fun foam.

Here's a close-up of the encrusted jewels:


Love all the challenges out there that keep me working on my Christmas cards!


Supplies:
Stamps - Old Island Stamping Co. sentiment
Ink - ColorBox Gold
Paper - thin chipboard, white cs
Size - A2
Accessories - star and tree dies, various gold embossing powders, various glitters, UTEE, Stampendous Shabby White embossing powder, fun foam


Tuesday, 22 January 2019

Tags on Cards

Krafty Chicks are challenging us to use "Tags".

I love making tags but don't really use them as tags so for me, they are a layer to go on a card.


First of all, the tag:

I used the splash watercolour technique with various blue Distress inks to colour the tag.  Then I stamped the little snowflake flurry across the top and heat embossed in white; and stamped and heat embossed the sentiment.
I die cut the tree twice and glued them together.  I patted Versamark all over it and heat embossed with Frantage Shabby Green embossing enamel.

I patted green and blue Distress inks on my craft mat, spritzed with water, and dragged a piece of seam binding through it.

Secondly, how I created the card:

I stupidly scored my card base on the wrong line of my ScorBuddy, but didn't want to waste it so decided to keep the back of the card wider than the front.  To tie the card base to the tag, I ran a strip of double-sided tape down the part that stuck out wider than the front and covered it with the Frantage Shabby Green embossing enamel and heated it.  Then added the tag to the front, popping it up on fun foam.


Here's another card using one of the tags I made.  This one is a bit over the top for me, but I did it for a SCS challenge to use stickers - never got around to posting it on my blog so thought I'd add it here.


For the tag, I layered with Distress Oxide inks, various stencils, some 3D sparkly paint (on the holly stencil), text stamping, and finally a die cut "merry" (cut once in black and once in gold with the black barely peeking out from behind the gold) and gold star stickers. I added a bit of gold ribbon to the top. 

On the white cardbase, I ran a long gold star border sticker, adding some of the tiny stars from the interior of the border sticker in random spots.


Which one do you prefer?  The first one in my more CAS style or the more ornate second one?


Supplies for the First Card:
Stamps - Rubber Soul snowflake flurry, Rosie's Roadshow sentiment
Ink - Versamark, ColorBox white, Versafine Onyx Black, various blue Distress inks
Paper - white cs, pre-cut tag
Size - A2
Accessories - Tim Holtz tree die, clear and white embossing powder, Stampendous Frantage Shabby Green embossing enamel, seam binding

Supplies for the Second Card:
Stamps - unknown Christmas text stamp
Ink - various Distress inks
Paper - kraft tag; gold, white, and black cs
Size - 8x5.75"
Accessories - various stencils, 3D green sparkly paint, PTI merry die, star stickers, star border sticker, gold ribbon


Wednesday, 16 January 2019

Winter Fir Trees


We're already midway through January!!!  Time to remind you about the CAS Watercolour Challenge:


I decided to use some wintery trees with a light snowfall:


For the trees, I tapped Distress Evergreen Bough and Bundled Sage on my craft mat, spritzed generously with water, and smooshed / splashed a piece of watercolour paper into it.

When dry, I die cut the three trees.

I tore some strips of cs for the snowy hills, ran my Versamarker along the torn edges, and heat set with Frantage Chunky White embossing powder. 

I put together the scene, then die cut it with a circle.  For the lightly falling snow, I sprinkled with the Frantage and heat set from underneath.  Finally popped it up on fun foam on a square card base.

Head on over to CAS Watercolour for more inspiration from our Design Team and this month's fabulous Guest Designer, Janet (Swanlady Impressions).  You only have until January 24th to link up your clean and simple winter-themed card.  I can't wait to see what you create!


Supplies:
Stamps - Penny Black sentiment
Ink - Distress Evergreen Bough and Bundled Sage
Paper - watercolour paper, white cs
Size - 4.75" square
Accessories - Impression Obsession fir tree dies, Spellbinders circle die, Versamarker pen, Frantage Chunky White embossing powder, fun foam


Monday, 2 April 2018

Watercoloured Robin

It's time for the next CAS Watercolour challenge!


I chose to make a Christmas card as I really do need so many of them, and birds are one of my favourite Christmas card motifs.


I stamped the robin in Versafine brown ink and heat embossed on a heavily textured watercolour paper.  I then watercoloured it with Gansai Tambi paints and fussy cut it.  I like the way the texture of the watercolour paper adds extra interest.

I sponged a background piece with two shades of blue Distress ink.  I trimmed it down to the square size I wanted and put it in the MISTI.  I inked up an evergreen bough stamp with two shades of green Distress inks, spritzed lightly with water and stamped.  I added some white gel pen to the evergreen bough for snow, and sprinkled and heat embossed chunky white Frantage for falling snow.

I popped the panel up on my card base with fun foam, added a white die cut sentiment, and glued the bird's feet to the branch and popped his body up with foam tape.

We'd love to see your CAS watercolour cards featuring birds.  You have until April 24th to link up here.  There is lots of inspiration from the rest of the Design Team and from our wonderful Guest Designer, Stef of Perry Papercrafts.


Supplies:
Stamps - Darkroom Door robin, Rubbernecker pine bough
Ink - Versafine Vintage Sepia;  Distress Chipped Sapphire, Faded Jeans, Evergreen Bough, and Pine Needles
Paper - white cs, watercolour paper
Size - 5.25" square
Accessories - Tim Holtz noel die, clear embossing powder, Stampendous Frantage Chunky White embossing enamel, fun foam, foam tape


Saturday, 17 February 2018

Stenciled Sky

Back to Christmas cards today, this time for Merry Monday where they are asking for a stencil on a Christmas card:


I recently bought some beautiful stencils from Rebecca Baer so used one of them on this card:


I made the background using a gelli plate, various blue acrylic inks, and my new stencil. 

I die cut the tree line, rubbed it with Versamark, then heat embossed with Frantage chunky green embossing powder.

I contemplated adding a sentiment but didn't want to cover up any of the beautiful sky so stamped one on the inside instead.


Supplies:
Ink - Versamark
Paper - white cs, mixed media cs
Size - A2
Accessories - Tim Holtz tree line die, Stampendous Frantage Chunky Green embossing powder, Rebecca Baer snow flurries stencil, various blue acrylic paints