A blog devoted to the cards I make in my tiny upstairs space. When my sister stays there, she calls it an "artist's garret". I'm not an artist, but am an enthusiastic cardmaker - hence the title "Cardmaker's Garret".
___________________________________________________________________________________________
Showing posts with label ink blending. Show all posts

Sunday, 26 January 2025

Cosy Fireplace and Delphinium Thank You

The Jingle Belles challenge has a photo to inspire us.  I was inspired by the fireplace and by the red and blue stockings hanging from the mantelpiece.  My Time to Craft Christmas wants a rectangle-shaped card.  And Sparkles Christmas Challenge wants to see something "Warm and Cosy".  Nothing like being in front of a warm fire at Christmas time!


I stamped the image, coloured it with coloured pencils blended with Gamsol (using only blue and red for the stockings to go with the image), stamped the sentiment in red, and bordered it with a blue polka dot dp.  I added Fun Flock to the pompoms and brims of the cat's and dog's hats, and added Glossy Accents to the berries and to the candle flames.

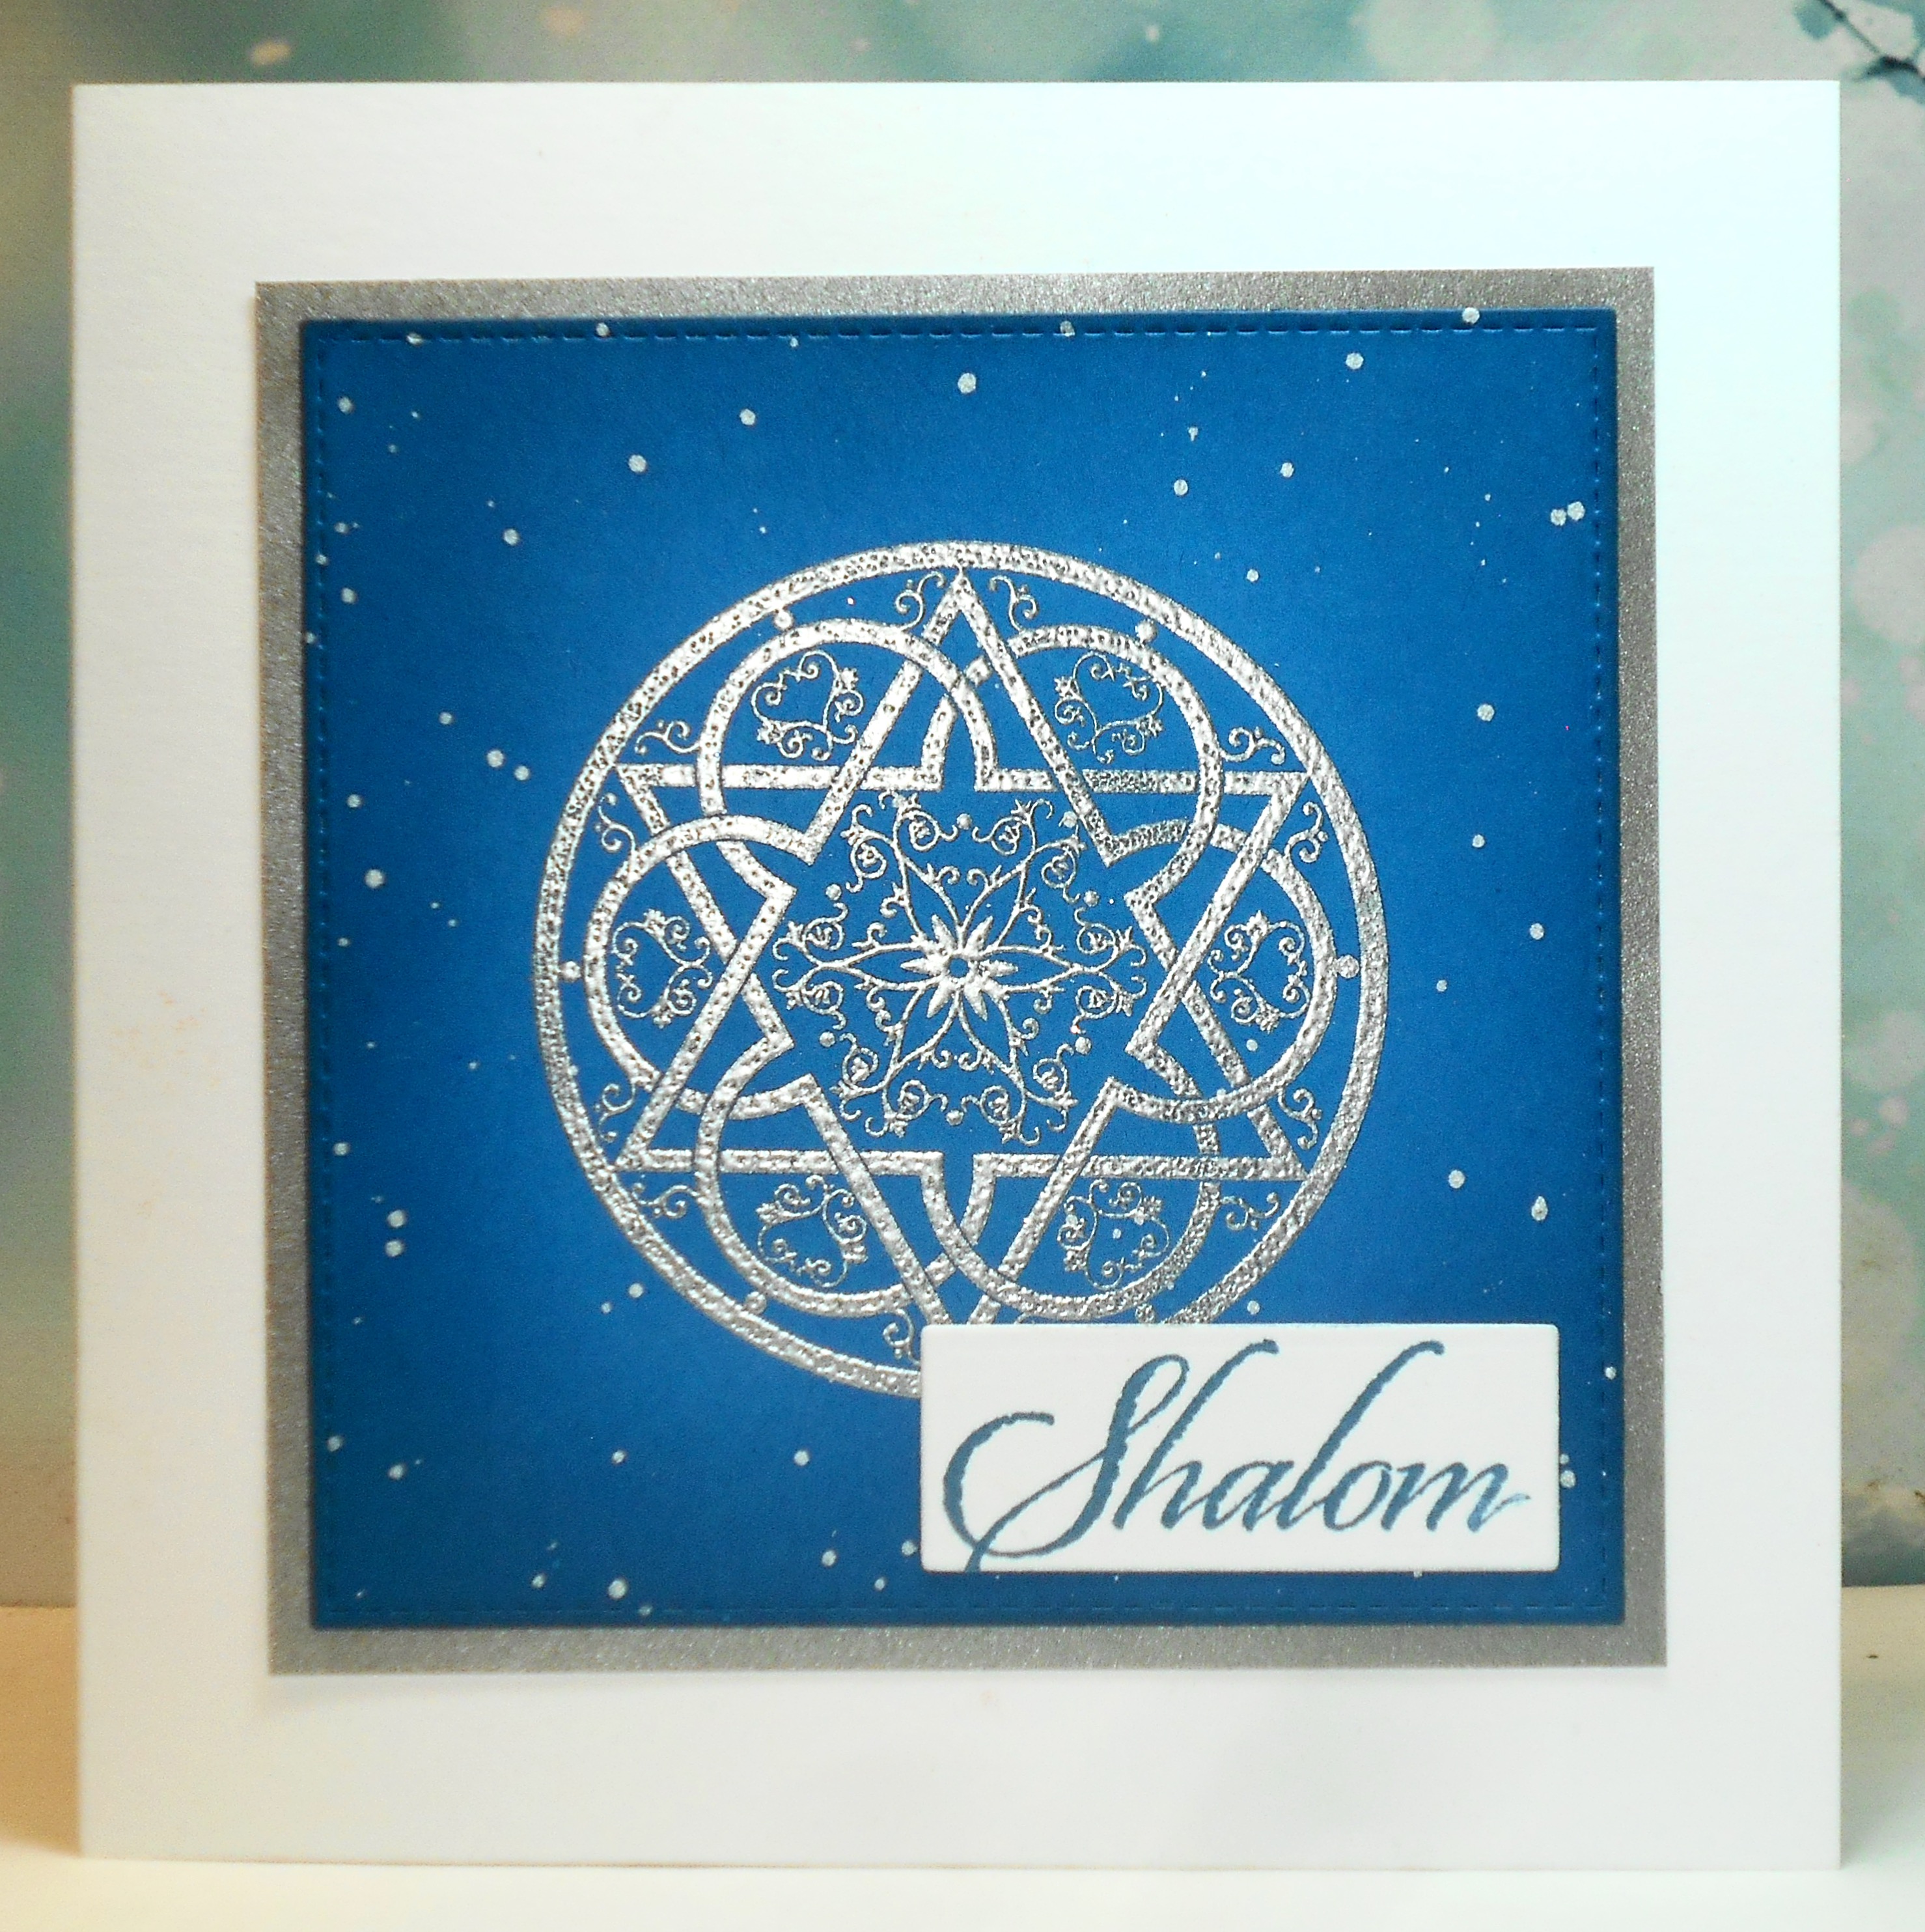
Today's twofer - a quick thank you card for Sweet Stampin's "Thank You Card" challenge.


I blended a background using three Distress inks. Dried it with my heat tool a bit and then heat embossed the delphiniums in white. I popped it up on fun foam on a black cs layer, added a white embossed sentiment on a black banner, and embellished with some sequins.

Please take a copy of our badge 


My Time To Craft Christmas!

Sweet Stampin' Challenge Blog 


Supplies for card 1:
Stamps - Penny Black image, unknown sentiment
Ink - Versafine Onyx Black, SU Real Red
Paper - white cs, blue polka dot dp
Size - A2
Accessories - coloured pencils, Gamsol, Fun Flock, Glossy Accents

Supplies for card 2:
Stamps - Magenta delphiniums, Savvy Stamps sentiment
Ink - Distress Faded Jeans, Dusty Concord, and Seedless Preserves; ColorBox white
Paper - white and black cs
Size - A2
Accessories - white embossing powder, sequins, fun foam


Monday, 20 November 2023

Dry Embossed Snow, Heat Embossed Poinsettias

Two new Christmas cards today.  For Can You Handle the Pressure (anything goes with dry embossing;  I didn't use the twist of turkey / Thanksgiving as I'm in Canada and we've already had our Thanksgiving), and for Stamping Sensations "Christmas":


The image is stamped in black and coloured with coloured pencils, then trimmed and bordered with black cs, layered on a dry embossed panel, and added to a white card base.

My second card is for My Time to Craft Christmas "Poinsettias" and Color Hues "Red and Gold":

I sponged a bit of darker red ink around the edges of a piece of red cs, then stamped and heat embossed the Christmas poinsettias / holly image in gold.  I bordered in gold shimmer cs, added a sentiment from my leftovers box (die cut from a piece that had gilding flakes stuck to it), and added Glossy Accents to all the berries in the image.

Please Grab Our Badge Please grab our logo   My Time To Craft Christmas!


Supplies for card 1:
Stamps - Serendipity farm, Penny Black sentiment
Ink - Versafine Clair Nocturne
Paper - white and black cs
Size - A2
Accessories - coloured pencils, Darice embossing folder

Supplies for card 2:
Stamps - Penny Black
Ink - ColorBox gold, Distress Aged Mahogany
Paper - gold shimmer and cream cs
Size - A2
Accessories - gold embossing powder, Glossy Accents, Tattered Lace "greetings" die, gilding flakes

Friday, 13 October 2023

Another Black Cat and Some Inkblending

I'm posting cards for the two AAA challenges today as they are linking up and offering prizes as long as you make different cards for each challenge.  For AAA Birthday Challenge "Favourite Colours", I've used blue, grey, and black - most of my clothes are in those colours!  I still had the Lavinia black cat sitting on my desk so decided to make a another birthday card using it as I have a few friends who love cats.  I'm also entering it at the Crazy for Cat Challenge.  It seems quite appropriate to be posting a black cat card on Friday Oct 13!


I masked a outer edges of a square and a moon on white cs and then blended Faded Jeans and Chipped Sapphire over it.  Then I removed the mask and stamped the botanical images in Iced Spruce.  I stamped the cat (with him partly going out of the square) and the sentiment in black.    Trimmed with a stitched square die and popped the panel up on fun foam.

And for AAA Challenge "Ink Blending with 3 or more colours", I made this card:


I used various Distress inks to create an ink blended background.  I trimmed it down and then heat embossed the delphinium in white.  The butterflies are die cut from a piece that I smooshed with Distress Oxide inks. 


Supplies for card 1:
Stamps - Lavinia "Mooch", unknown botanical stamps and sentiment
Ink - Versafine Clair Nocturne, Distress Faded Jeans, Chipped Sapphire, and Iced Spruce
Paper - white cs   Size - 4.75" square
Accessories - Lil Inker stitched square die, fun foam

Supplies for card 2:
Stamps - Magenta delphinium, unknown sentiment (Rubbernecker?)
Ink - various Distress and Distress Oxide inks, ColorBox white, Ranger Archival Cobalt
Paper - white cs
Size - A2
Accessories - white embossing powder, Gina Marie small butterfly dies


Monday, 28 August 2023

Water Lifting on Christmas Cards

This month the Group of Seven Cardmakers all tried water lifting from an ink blended background.  I love the results so made three Christmas cards using the technique.

First up a green ink blended background that was ideal for a holly image:

I started by sponging three colours of Distress inks onto card stock, blending well between each colour.  Then dried it with my heat tool and went over it with anti-static powder.  I stamped the image and heat embossed it in white.

Then came the water lifting of the holly leaves and berries - I painted inside the embossed lines with plain water and a brush, blotting with paper towel as I went along (this lifts the ink inside the image).  The image becomes lighter as the cs dries.  I love the ethereal image you get!

I finished off by trimming it into a square and adding it to a shimmery off-white cs base and added a few opaque white sequins in random spots.

I went on to make two more backgrounds, each in different shades of blue.  I stamped dove images on each and again used the water lifting technique on the doves.  I added the first one to a white card base, stamped the sentiment on a scrap of white cs, and embellished with two opaque white sequins in the bottom right corner to balance with the sentiment in the upper left corner.

My second blue background had a really splotchy section on one side so I trimmed it down to make a mini slimline card, stamped with a different dove stamp (it includes the sentiment), popped it up on fun foam on a dark grey-blue glitter border, and added that to a white card base.

This is a great technique that I'll use again for sure.  Head over to the Group of Seven Cardmakers' blog to see what the others made and for more info and links to videos for the techniques.


Supplies for card 1:
Stamps - Visible Image
Ink - Distress Evergreen Bough, Iced Spruce, and Rustic Wilderness; ColorBox White
Paper - white cs, off-white shimmer cs
Size - 4.25" square
Accessories - white embossing powder, opaque white sequins

Supplies for card 2:
Stamps - Magenta dove, unknown sentiment
Ink - Distress Broken China, Stormy Sky, and Faded Jeans; ColorBox White
Paper - white cs
Size - A2
Accessories - white embossing powder, opaque white sequins

Supplies for card 3:
Stamps - Penny Black
Ink - Distress Salty Ocean, Broken China, and Weathered Wood; ColorBox White
Paper - white cs, slate glitter cs
Size - 6x3.25"
Accessories - white embossing powder, fun foam


Sunday, 28 May 2023

Ink Blending on Coloured Cardstock

Our Group of Seven Cardmakers technique for May was ink blending on coloured cardstock.  It's a great easy technique to add extra interest to coloured cardstock.  We used a video called "Be Bold and Add Drama to Your Cards".

I ended up making three cards while practising the techniques, two for Hannukah and one for Christmas.

For both of these cards, I used a lighter blue cs and a slightly darker shade of blue ink for blending around the edges.  The images are heat embossed in silver and the panels are bordered in silver.  On the first card I added some water splatters as well as the white splatters, but on the second, I just did white splatters.

Here's the Christmas card:

I did this first on a darker red cs but the ink blending didn't show up enough so I redid it using a lighter red cs.  Gold heat embossing, gold splatters, and a gold card base tied it all together.

These really are quick and easy cards to make so I'm sure I'll be using the technique again.  My only piece of advice to those of you who want to try it is to make sure your coloured cs is light enough to leave some contrast with your ink blending.

Head over to Group of Seven for more information and samples from the rest of the group.  Feel free to link up any cards you make using the technique but just be aware we are not a challenge and don't promise to comment on all of your cards.


Supplies for Hanukkah cards:
Stamps - SU Jewish Celebrations
Ink - Versamark, Distress Faded Jeans
Paper - white, blue, silver cs
Size - 5.25" square
Accessories - TH silver embossing powder, white paint


Supplies for Christmas cards:
Stamps - Penny Black
Ink - ColorBox gold, Distress Aged Mahogany
Paper - red, black, gold cs
Size - A2
Accessories - TH gold embossing powder, gold paint