A blog devoted to the cards I make in my tiny upstairs space. When my sister stays there, she calls it an "artist's garret". I'm not an artist, but am an enthusiastic cardmaker - hence the title "Cardmaker's Garret".
___________________________________________________________________________________________

Thursday, 31 October 2024

A Tiny Snowman and A Recycled Ornament

Christmas Cards All Year Round wants snowmen.

I stamped the image and sentiment onto the centre of a piece of watercolour paper, and used watercolour paints to colour it.  Then I placed it in a snowflake frame embossing folder and ran it through my Cuttlebug.  It came out partly embossed normally and partly letterpress.  I really like the look so am going to check for more stamps that will fit in that centre section.


My other card today is for 52 Christmas Card Throwdown's recycling challenge.  A friend and I regularly go out for tea and pastries at a lovely little French cafe.  I always save the foil cardboard thingies that the pastries come on as they look exactly like a Christmas ornament.  So that is the recycled item on my card.

I die cut the holly out of some smooshed green leftovers and the word joy out of some red glitter cs and glued both to the gold "ornament".  Because the foil is so slippery, the glue oozed out from under it in a lot of places.  There was no way to get it off so I sprinkled fine glitter all over the sticky sections.  It looks better in real life - quite sparkly - but in the photo it looks kind of splotchy.  I added red Stickles to the berries on the holly, and wrapped red twine around the top and through a hole I punched in the top of the ornament and through the card base.

Grab our badge!  


Supplies for card 1:
Stamps - Penny Black
Ink - Versafine Onyx Black
Paper - watercolour paper, off white cs
Size - A2
Accessories - Ultimate Crafts Snowflake Frame embossing folder, watercolour paints

Supplies for card 2:
Paper - white cs, leftover smooshed green scrap
Size - 4.75" square
Accessories - holly die, Joy die, red Stickles, red metallic twine

Monday, 28 October 2024

Glitter on Acetate

The Group of Seven Cardmakers are trying out painting with glitter on acetate.  Our website suggests two different methods.  I chose the one described in this video and made this card:

I stamped and heat embossed the flowers on the front of the acetate.  I stamped with StazOn which normally can't be used with embossing powder as it dries too fast, but on acetate it dries more slowly.

Then working from the back, I used a clear-drying glue and glitter to colour the poppies.

When you first turn it over, it just looks like white blobs of glue from the front - it needs a few hours for the glue to completely dry and turn clear, and then you can see your lovely colours of glitter.

I die cut three layers of the frame, glued two of them together and glued the acetate layer on top of them, and then added the third one to frame it.  This raises it slightly from the card base and gives a bit more of a see-through quality to it.

If you're interested in getting covered in glitter (as I was) and making a glittery mess of your craft desk (ha ha), please give one of our techniques a try and link it up at Group of Seven and inspire us some more!


Supplies:

Stamps - Penny Black
Ink - StazOn Black
Paper - white cs
Size - A2
Accessories - acetate, glitter, MFT pierced dot frame

Saturday, 26 October 2024

One of Many Birds and Monochrome Sympathy

Shopping our Stash is asking to see our birds - and boy, do I have a lot of bird stamps!!  For this card, I used one of my older ones that is still a favourite.  I'm also adding it to the Inkspirational challenge "Seasonal".


A very CAS card and quick to make - stamped, watercoloured the berries dark red, trimmed with a stitched rectangle, bordered with dark red, popped up on fun foam, and Glossy Accents added to the berries.

And for My Time to Craft "Monochrome":

I masked off a rectangle on my focal panel and sponged from three corners first with the lighter ink, then the darker. I stamped the leaves and text with second generation stamping, and then stamped the sentiment with full strength ink.  It's popped up on fun foam on an embossed background.


Supplies for card 1:
Stamps - Magenta chickadee, Rubber Soul sentiment
Ink - Versafine Clair Nocturne, Memento Rhubarb Stalk
Paper - white and red cs, watercolour paper
Size - A2
Accessories - red watercolour paint, Lil Inker stitched rectangle die, Glossy Accents, fun foam

Supplies for card 2:
Stamps - SU Very Versailles, unknown sentimen
Ink - various aqua / turquoise Distress inks
Paper - white cs
Size - A2
Accessories - textured embossing folder, fun foam


Thursday, 24 October 2024

Stencilled Poinsettias and Tower Bridge

Sneaking in under the wire for the Flower Challenge "Add a Stencil"!  I used a poinsettia stencil and let it be the focus of the card.

I used FineTec Pearlescent watercolour paints applied with small sponge daubers through the stencil.  Make sure the paint isn't too watery - you don't want it to seep out under the stencil.  You want more of a paste kind of texture than a really watery watercolour paint.  They give a wonderful shimmer - much better in real life.  I trimmed the panel, bordered it with red and green shimmery cs, wrapped cream coloured ribbon around it, added a sentiment to the top of the ribbon, and added the whole lot to a cream shimmer card base.

For a change of pace, I've made a card for a friend who loves travelling - he's heading off to England.  I'm entering it at Cardz 4 Guyz  "T is for ....".  I went with travel and Tower Bridge.

The focal panel was made by smooshing with blue Distress Oxide inks, then stamping the image of Tower Bridge and the London text stamp on it, bordering with black cs, and popping it up on fun foam on a background of blue speckled dp.

Cardz 4 Guyz Logo


Supplies for card 1:
Stamps - unknown sentiment
Ink - gold ink
Paper - cream cs, cream shimmer cs, light red and light green shimmer cs
Size - A2
Accessories - Tim Holtz poinsettia stencil, cream ribbon, sentiment banner die, FineTec pearlescent watercolours

Supplies for card 2:
Stamps - unbranded stamps
Ink - various blue Distress Oxide inks, Archival Jet Black
Paper - white and black cs, blue dp
Size - A2
Accessories - fun foam


Saturday, 19 October 2024

Sheep in Red Sweaters

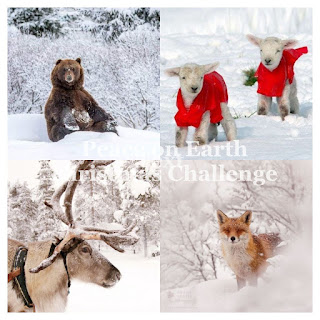
The Peace on Earth's mood boards almost always inspire me!  This time one of the images immediately made me think of my stamp of two sheep in Christmas sweaters.


A quick make - stamped and watercoloured and trimmed with a stitched rectangle before putting on the card base.  I used gold metallic paint for the star in the sky and the stars on one of the sweaters, and splattered a bit of gold paint and the grey paint I used for the ground.

Here's the Peace on Earth mood board:


Head over to Peace on Earth to see how the rest of the Design Team were inspired and then come and join us!


Supplies:
Stamps - Inky Doodles
Ink - Versafine Onyx Black
Paper - watercolour paper, off white card base
Size - A2
Accessories - watercolour paints, gold metallic paint, Lil Inkers stitched rectangle die

Wednesday, 16 October 2024

Pink Christmas for the Cure

Every year at this time, Stephanie and Lauren of the Jingle Belles Christmas Card Challenge donate $2 each for every card that is entered in their "Pink Christmas for the Cure" challenge.  Here's my card:

I used a new technique I saw in a challenge on SCS - Finger Painting with a MISTI.  For details, see this video.

I put the stamp in my MISTI and used my index fingertip to add various Distress and Memento inks to the stamp, stamping in between applications of colour.  I lost some of the definition of the smaller petals so went around them with a coloured pencil to put back the definition.  I trimmed the panel with a stitched rectangle, added a sentiment, bordered with a dark green speckled cs, and added some gold liquid pearls to the centre of the poinsettia and some glossy accents to the berries.

I encourage you to make a pink Christmas card and link up with Jingle Belles before October 23rd.


Supplies:
Stamps - Penny Black poinsettia, unknown sentiment
Ink - Distress Picked Raspberry, Memento Rose Bud, Lady Bug, Northern Pine
Paper - watercolour paper, dark green speckled cs, off-white cs
Size - A2
Accessories - Lil Inker stitched rectangle, gold Liquid Pearls, Glossy Accents, coloured pencil

Monday, 14 October 2024

The Word "Christmas" and Autumn Colours

A couple of cards for today - a dreary pouring-with-rain day here in Vancouver.  So a perfect day to spend in my craft room before I go out for Thanksgiving dinner at a friend's house.

For Sparkles Christmas Challenge ("use the word Christmas on your project") and Word Power (the sentiment is the focus of the card):


I die cut the SSS Holiday Frame out of dark gold cs and layered it over a background created by sprinkling Shabby Blue embossing enamel over a piece of cs and heating it from underneath so that it didn't blow off.  It's a nice mix of fine blue sparkly particles and larger white and gold particles.  I added a gold star and put the whole panel on fun foam on the card base to create some dimension.

Next up, using autumn colours of orange and brown for The Paper Players' colour challenge:


I smooshed a piece of watercolour paper in some Distress orange and brown inks. I got a really nasty section on one area so decided to tear the panel down one edge and get rid of the nasty section.

I die cut a poppy out of off white shimmer cs and out of some scrap cs, glued them together for more dimension, glued it on the smooshed panel, and wrapped with twine.

I debated adding a vertical sentiment but it would have been squished so left it blank - I can add a sentiment inside if I need to.

Please take a copy of our badge  Please share our Blog Badge


Supplies for card 1:
Paper - white cs, dark gold shimmer cs
Size - A2
Accessories - SSS Holiday Frame, star die, Stampendous Shabby Blue embossing enamel

Supplies for card 2:
Ink - Distress oranges and browns
Paper - off white cs, off white shimmer cs, watercolour paper
Size - A2
Accessories - Memory Box poppy die, twine

Thursday, 10 October 2024

Two Non-Christmas Cards

You all know how my main focus is Christmas cards but I've just made a bunch of them for SCS Falliday Fest challenges as I'm hosting one of the challenges coming up Oct 17 and also made samples for some of the other challenges.  So if you're a SCS member, be sure to head over and check out the challenges - four new ones posted each day from Oct 10 - 19.

So I decided to take a break and make two non-Christmas cards.  There are a bunch of great autumn-themed challenges out on blogland so I made this card for these ones: Try It On Tuesday "Autumn Magic", Stamping Sensations "Autumn Colours", My Time to Craft "Autumn Season Colors", The Four Seasons Challenge "Fall", and AAA Card Challenge "Autumn".  I'm also linking up to Addicted to CAS "Masculine".


Stamped and watercoloured, trimmed with a label die, and popped up on fun foam on a kraft card base.  I went over the berries with Glossy Accents.

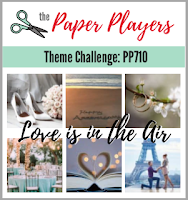
The Paper Players' challenge is "Love is in the Air" so I'm entering this card:

The heart was done in a hot foiling machine and was not totally successful - it's missing quite a lot of the gold foil.  But I quite like it anyway as it has kind of a distressed look.  I popped it up on fun foam on a square I embossed with the SU Subtle folder.  Added it to a white card base and die cut the word "love" from red glitter paper.

Pop this on your blog to find us fast!  Please grab our logo My Time To Craft!

Please Grab Our Badge  Grab our Badge!  


Supplies for card 1:
Stamps - Magenta leaves and berries, unknown sentiment
Ink - Versafine Onyx Black
Paper - kraft cs, watercolour paper
Size - A2
Accessories - Sizzix die, foam tape, watercolour paints, Glossy Accents

Supplies for card 2:
Paper - white cs, red glitter cs
Size - 4.75" square
Accessories - Glimmer gold foil, SU Subtle embossing folder, Great Expressions Decorative Heart die, Tim Holtz sentiment die


Saturday, 5 October 2024

Frosty Friends

Peace on Earth's new mood board (see at end of post) has the sweetest image of a young deer and a rabbit.  It immediately made me think of my Anita Jeram stamp.  And I had the perfect sentiment for it too.


Stamped and watercoloured, trimmed with a rectangle die, and bordered with some blue/grey cs.  The white spots on the deer were added with a Posca paint pen.

Here's the Peace on Earth mood board.  We'd love to see if it inspires you!


Supplies:
Stamps - Colorado Craft Co. Anita Jeram image, PB sentiment
Ink - Versafine Onyx Black
Paper - watercolour paper, blue/grey and off white cs
Size - A2
Accessories - watercolour paints, white Posca paint pen

Thursday, 3 October 2024

Two Christmas, One Birthday

I'm definitely in the mood for making cards these days.  Must be something about the change in the weather!

First up for Can You Handle the Pressure? (use an embossing folder and have a sentiment on the card), Christmas Cards All Year Round (snowmen), and for Christmas Kickstart ("embossing folder fun"):

I used a corner embossing folder on my focal panel.  I stamped and heat embossed my snowman image in dark blue and trimmed it close to its border so that it would fit in the space left by the embossing folder.

For Shopping our Stash (leaves), I pulled out a stamp I hadn't yet inked up so I'm adding it to the NBUS challenge as well.

I put the stamp in my MISTI and inked it up with Tombow markers, spritzing lightly and   stamping on mixed media cs.  I trimmed the panel with a pierced dot rectangle and went around the edges with Antique Linen Distress ink to give it a vintage look.  I stamped and heat embossed the sentiment on brown cs, and used a red shimmer card base.  I finished it off with Glossy Accents on the berries.

I've got a third card today as I needed to make a birthday card for a friend that I go out for tea with a lot.  I'm entering it at Festive Friday where they are celebrating National Dessert Day - nothing like cupcakes and iced cookies for dessert!  I've got pink, cream, desserts, spoon, and stamping from their inspiration list.

I kept the card very CAS card as the image is quite busy. Stamped, coloured with coloured pencils, bordered with dark pink, and popped up on fun foam.

 Please Grab Our Badge Grab our badge! 

Grab Our Badge! Grab our badge to display on your blog.


Supplies for card 1:
Stamps - Local King
Ink - Versafine Majestic Blue
Paper - white cs
Size - A2
Accessories - clear embossing powder, snowflake swirl embossing folder

Supplies for card 2:
Stamps - Tim Holtz holly, Penny Black sentiment
Ink - Distress Antique Linen, Versamark
Paper - mixed media cs, brown cs, red shimmer cs
Size - A2
Accessories - Spellbinders pierced dots rectangle die, Tombow markers, Papermania Seafoam embossing powder, Glossy Accents

Supplies for card 3:
Stamps - SavvyStamps sentiment, Serendipity Afternoon Tea
Ink - Memento Tuxedo Black
Paper - Bristol cs, dark pink cs, linen cs
Size - A2
Accessories - coloured pencils, fun foam