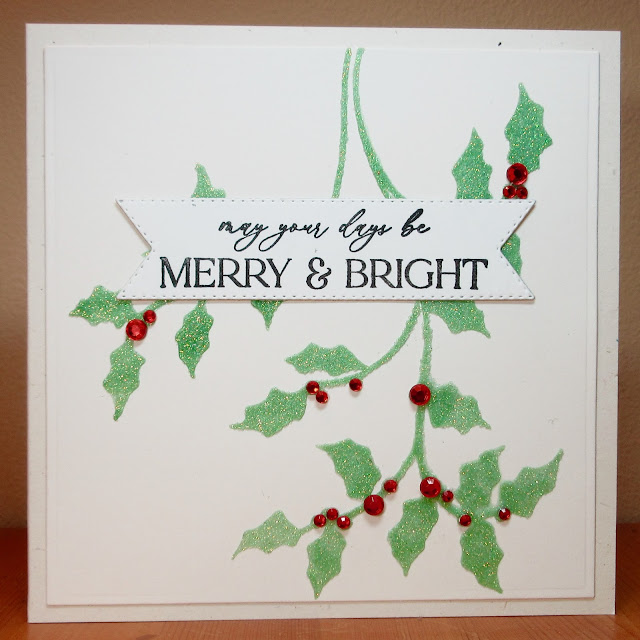
Group of Seven Cardmakers are playing with paste this month. I made one new card using glitter paste that I coloured with green ink.
I tapped some Rustic Wilderness Distress ink onto my craft mat and mixed in some Nuvo glimmer paste - it has lovely sparkle in it. I then spread it through a holly stencil on off-white cs. I kept the card very CAS so that the embossed holly takes centre stage, but I added quite a large sentiment on a banner over a section where the paste went under the stencil. I finished off with red gemstones on all the berries that were part of the stencil.
I happened to do a couple of cards using paste recently so I thought I'd repeat them here as they used pastes in two other ways.
This one uses a mixture of pastes to get some interesting varied colour - a rough mixture of black, copper, and white embossing paste. It came out way too dark and too shiny so I then sponged white gesso over it to lighten it and dull it down a bit. I also splattered a bit of the white gesso on it. See this post for list of supplies and more details.

I mostly use paste through a stencil, but I decided to try a card where I just used paste without a stencil - in this case some Distress Snowfall Grit Paste applied directly to the focal panel to make the snowy ground. See this post for details.
That's lots more examples from the rest of the Group of Seven design team, and if you're inclined to make a card using paste in some way, please link it up to inspire us with your ideas.
A couple of comments about paste:
1. I decided to check all of my various pastes as I hadn't used a lot of them for a while. I threw out three pots because they had totally dried out. They were not nearly as old as my Dreamweaver pastes which I've had for at least 10 years and are still lovely and spreadable. Sadly Dreamweaver no longer exists.
2. I have a magnetic board and it's one way to hold down cs and stencil but I don't find it as effective as taping the stencil down on the cs. On the magnetic board, the paste is more likely to go under parts of the stencil. Or for a very detailed stencil, I recommend Pixie Spray to stick it down really well.

I'm also linking up to Stencil Fun (anything with a stencil goes).
Supplies for the holly card:
Stamps - unknown sentiment
Ink - Versafine Onyx Black, Distress Rustic Wilderness
Paper - off white cs
Size - 5.5" square
Accessories - Memory Box holly stencil, Nuvo Glimmer Paste, red gemstones, stitched banner die


These all look fabulous Susan, and show different interesting ways to use texture pastes. The coloured glitter paste works terrifically on the holly and I love all the added red gem berries, and then the mix of colours and the added white gesso on the brick wall has given it a very realistic look, and the texture paste for the snow works well and gives it lots of wonderful dimension. x
ReplyDeleteThree great examples of using paste and the cards are all unique. I love the wreath on the brick wall.
ReplyDeleteSo pretty Susan! Love the brick wall best!
ReplyDeleteGreat cards Susan, your brick wall really caught my eye. The colours with the gesso are perfect. I can't wait to see them all IRL :)
ReplyDeleteThree fabulous cards using pastes, Susan. LOVE the beautiful shimmer of your glitter paste with green colouring. It's just gorgeous for your holly and I love the red gemstones to finish. Always great when you can place a sentiment strategically on your card! I also love the wreath on the brick wall of paste. The mix of colours makes it look like real stone --- great work!! And I love the gesso to tone down the colours and remove the shine. That is so clever of you. Also love the grit paste on the bottom of your third card. What a great way to create snowhills to ground your amazing birds. I have learned a lot from your post. Thanks so much! xx
ReplyDeleteYour sparkly holly is beautiful, Susan! So much texture and dimension! I love the brick background and thanks for the tip on the gesso. I did a brick background that is too dark. The white wreath shows really well on the bricks! The snow has so much texture and is a perfect spot for those pretty red birds!
ReplyDeleteTerrific trio of Christmas cards. The texture and dimension from the pastes are awesome.
ReplyDelete