A blog devoted to the cards I make in my tiny upstairs space. When my sister stays there, she calls it an "artist's garret". I'm not an artist, but am an enthusiastic cardmaker - hence the title "Cardmaker's Garret".
___________________________________________________________________________________________

Friday, 28 March 2025

Paste through a Stencil, Paste without a Stencil

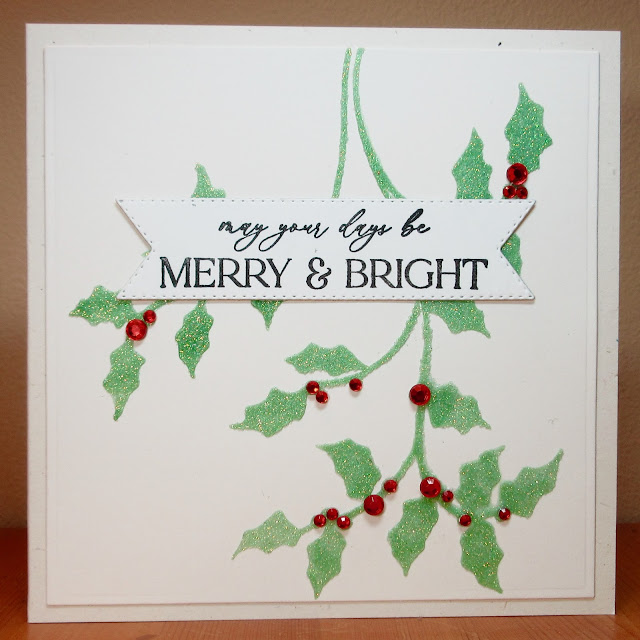
Group of Seven Cardmakers are playing with paste this month.  I made one new card using glitter paste that I coloured with green ink.

I tapped some Rustic Wilderness Distress ink onto my craft mat and mixed in some Nuvo glimmer paste - it has lovely sparkle in it.  I then spread it through a holly stencil on off-white cs.  I kept the card very CAS so that the embossed holly takes centre stage, but I added quite a large sentiment on a banner over a section where the paste went under the stencil.  I finished off with red gemstones on all the berries that were part of the stencil. 

I happened to do a couple of cards using paste recently so I thought I'd repeat them here as they used pastes in two other ways.

This one uses a mixture of pastes to get some interesting varied colour - a rough mixture of black, copper, and white embossing paste. It came out way too dark and too shiny so I then sponged white gesso over it to lighten it and dull it down a bit. I also splattered a bit of the white gesso on it.  See this post for list of supplies and more details.


I mostly use paste through a stencil, but I decided to try a card where I just used paste without a stencil - in this case some Distress Snowfall Grit Paste applied directly to the focal panel to make the snowy ground.  See this post for details.

That's lots more examples from the rest of the Group of Seven design team, and if you're inclined to make a card using paste in some way, please link it up to inspire us with your ideas.

A couple of comments about paste:

1. I decided to check all of my various pastes as I hadn't used a lot of them for a while.  I threw out three pots because they had totally dried out.  They were not nearly as old as my Dreamweaver pastes which I've had for at least 10 years and are still lovely and spreadable.  Sadly Dreamweaver no longer exists.

2. I have a magnetic board and it's one way to hold down cs and stencil but I don't find it as effective as taping the stencil down on the cs.  On the magnetic board, the paste is more likely to go under parts of the stencil.  Or for a very detailed stencil, I recommend Pixie Spray to stick it down really well.


I'm also linking up to Stencil Fun (anything with a stencil goes). 

LOVE to have you SHARE our BADGE


Supplies for the holly card:
Stamps - unknown sentiment
Ink - Versafine Onyx Black, Distress Rustic Wilderness
Paper - off white cs
Size - 5.5" square
Accessories - Memory Box holly stencil, Nuvo Glimmer Paste, red gemstones, stitched banner die



Sunday, 23 March 2025

A Gilded Bird and Green with No Grinch

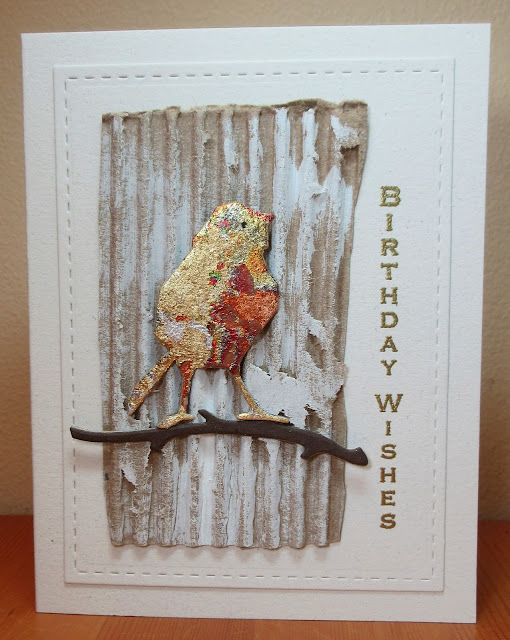
A gilded bird for Seize the Birthday "Anything that Flies" and for Double D "Birds".


I tore a strip of cardboard from a box, and roughly peeled one layer of the paper off. Then randomly brushed gesso over it.

I put double sided tape on a small scrap of cs and added gilding flakes to it. I die cut the bird, getting his breast area onto the reddest section. I also die cut it twice out of scrap cs and glued them together for more dimension. The branch is cut from brown cs twice and glued together. Then glued both onto the corrugated cardboard.

I stamped and heat embossed a vertical sentiment in gold on a piece of chalk coloured cs and trimmed it with a stitched rectangle die. Added it to the card base and added the corrugated cardboard piece to it.

My second card is for Jingle Belles "Get Your Grinch On" (use green).

 
The base of the focal panel is dry embossed, then a variety of greenery die cuts arranged as a swag over it.  I wrapped baker's twine around my focal panel and made a bow at the top of the swag.  I splattered the swag with diluted white acrylic paint and an old paint brush. 

I cut the greenery die cuts out of different scraps of green cs so I'm also taking it over to Snippets.
 
   The Double D's    Player's Badge


Supplies for card 1:
Stamps - unknown vertical sentiment
Ink - ColorBox gold
Paper - scrap of corrugated cardboard, chalk and brown cs
Size - A2
Accessories - Tim Holtz bird die, gilding flakes, unknown branch die, gesso, gold embossing powder, Lil Inker stitched rectangle die

Supplies for card 2:
Stamps - unknown sentiment
Ink - Memento Tuxedo Black
Paper - white cs, scraps of different green cs
Size - A2
Accessories - Sizzix embossing folder, TH greenery dies, sentiment label die, red/white baker's twine, white acrylic paint


Thursday, 20 March 2025

Collage Stamps - One Stamp Only

I really like single stamps that have more than just one thing in them - they are what I call "collage stamps".  I've got two cards using them today.

The Paper Players want a CAS card using just a single stamped image.  By using one of my "collage stamps", I can get a lot of interest in a CAS card.  And since I've never used the stamp before, I'm also entering it over at NBUS.

I created a bit of a smooshed background with Distress Old Paper and Pumice Stone to give my focal image piece an aged vintage look. Then put it and the stamp in my MISTI and stamped with a light grey ink (Archival Hickory Smoke). I then coloured the branch and berries with watercolour pencils. I lost too much detail with my colouring so overstamped with black ink.  Then bordered with red, added it to an off-white card base, and put Glossy Accents on the berries.

With another "collage stamp", I made this card for 52 Christmas Card Countdown "Reindeer" and Sparkles Christmas Challenge "Christmas Critters"

 
I made the background panel using various blue Distress inks and an embossing folder for the embossing folder stamping technique (see this tutorial for instructions).  
 
For the focal panel, I created a background by experimenting with using some photo paper with Oxide inks and a baby wipe. I smooshed with various shades of blue and mauve Oxide inks, drying between layers. When I was finished and the piece was completely dry, I wiped off the chalkiness of the Oxide inks and was left with a lovely glossy background.  I put it in my Misti and stamped the reindeer collage stamp with black StazOn.
 
 
Please take a copy of our badge  Grab our badge to display on your blog.


Supplies for card:
Stamps - Tim Holtz Festive Collage
Ink - Versafine Clair Nocturne, Archival Hickory Smoke, Distress Old Paper and Pumice Stone
Paper - watercolour paper, red and off-white cs
Size - A2
Accessories - Tim Holtz watercolour pencils, Glossy Accents

Supplies for card 2:
Stamps - Studio Light
Ink - various blue and mauve Distress and Distress Oxide inks, black StazOn
Paper - cream shimmer cs, watercolour paper, photo paper
Size - A2
Accessories - baby wipe, snowflake embossing folder


Saturday, 15 March 2025

Gnome with Stars

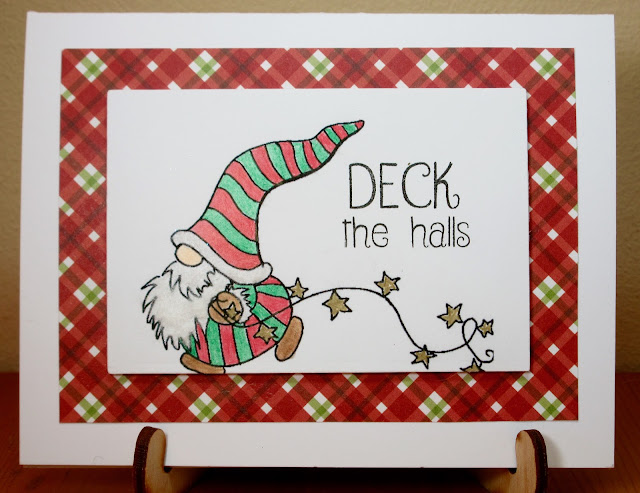
The new mood board at Peace on Earth is full of gnomes.  Since I don't own any gnome stamps, I broke down and bought a digi stamp!  Not really my cup of tea as I love real stamps but it's a cute image!

He's coloured with coloured pencils (including a metallic gold one for the stars), popped up on fun foam on the layer of dp, and embellished with Fun Flock on the brim of the hat, cuff of the glove, and beard.  I thought the "deck the halls" sentiment was perfect as he looks like he's dashing off to decorate with his string of stars.

Here's the mood board that inspired it:

There's lots more inspiration from the rest of our Design Team featuring gnomes over at Peace on Earth!  We'd love to have you join us!


Supplies:
Stamps - digi stamp from Etsy, PB sentiment
Ink - Versafine Onyx Black
Paper - white cs, plaid dp
Size - A2
Accessories - coloured pencils, Fun Flock, fun foam

Tuesday, 11 March 2025

A Feminine Shoe and an Encircled Poinsettia

My youngest sister loves shoes and she is a voracious reader.  I made this card for her and for Try It on Tuesday ("For a Lady"), Inkspirational ("CAS with a twist of stickers or ephemera" - I think the shoe counts as ephemera as I took it off a commercial card), and Word Power (the sentiment is the main focus).


I stamped the sentiment and trimmed with a pierced dot rectangle die, and popped the shoe up next to it - all on a matching pink card base.

And of course, getting on with Christmas cards.  This one uses up a lot of snippets of leftover cs so I'm linking up to the Snippets Challenge.  And to the Flower Challenge ("Add Circles") and Beautiful Blossoms (anything flowers). 


I die cut the poinsettia in red cs, sponged a bit of Distress Aged Mahogany around the edges, then layered them together. I embellished with dark red gemstones.

The sentiment and poinsettia are placed on white shimmer cs. I bordered the poinsettia's circle with a red cs inverted scallops circle. The card base is green shimmer cs.

Pop this on your blog to find us fast!    Please share our Blog Badge

Player's Badge 

Our Blog Badge


Supplies for card 1:
Stamps - Crafters Companion sentiment
Ink - Versafine Onyx Black
Paper - white and pink cs
Size - A2
Accessories - Spellbinders pierced dot rectangle die, shoe from a commercial card

Supplies for card 2:
Stamps - Rubber Soul sentiment
Ink - Staz-on black, Distress Aged Mahogan
Paper - white shimmer and green shimmer cs, red cs
Size - A2
Accessories - Memory Box Blooming Poinsettia die, Spellbinders circle and inverted scallop circle dies, dark red gemstones, stitched banner die


Friday, 7 March 2025

No Stamping Birthday and Green with Butterflies

Seize the Birthday wants to see a "no stamping" card and the AAA Birthday Card Challenge wants something masculine.  I combined the two for my nephew's upcoming birthday.


I started by spraying some mixed media cs with gold and a little bit of silver metallic sprays. When dry, I die cut the gears border and the sentiment.

I glued them to a background on which I'd lightly stencilled some gold ink, and then popped the panel up on fun foam for some dimension. 

Triple B wants to see birds, blooms, or butterflies in green, and the Double D challenge wants to see mostly green on the card.

I created a debossed inky resist with my butterflies embossing folder by rubbing the raised pattern with Versamark, putting mixed media cs into the folder, and running it through my Cuttlebug, and then adding clear embossing powder and heating it.  See this video for instructions.

I then smooshed the panel with a bunch of green Distress inks and a little touch of blue.  I added the panel to the card base and die cut a solid butterfly out of white shimmer cs and the top layer of the butterfly out of blue shimmer cs (I tried doing it with green shimmer cs but there wasn't enough contrast and also I wanted to bring out the touch of blue in the background a bit).


Supplies for card 1:
Ink - Martha Stewart gold ink
Paper - white and mixed media cs
Size - 4.75" square
Accessories - various gold and silver sprays, TCW screen print stencil, gears die

Supplies for card 2:
Ink - Versamark, various green and blue Distress inks
Paper - mixed media cs, white cs, white and blue shimmer cs
Size - A2
Accessories - Darice embossing folder, memory Box butterfly dies

Wednesday, 5 March 2025

Nordic Winter and Blinged Holly


For the ABC Christmas Challenge, I'm going with "D for Die Cuts".


I got out my Tim Holtz Nordic Winter die - it's so much fun to use.  I die cut it three times, once each out of white, green, and bronze shimmer cs, then made a blue shimmer card base, glued the negative piece from the white die cut over it, and then inlaid the green trees and bronze reindeer.  I added a sentiment on a narrow strip banner.
 
The problem with using this die (which I love) is that you always end up with many leftover little bits, and how many cards do I want to make to use them all up?!!   But it is fun doing the inlaying and coming up with colour combinations for it. 

I've also got a card today for the Jingle Belles challenge "Bring on the Bling".  Lots of gemstones on this card:
 
I laid a holly stencil over watercolour paper, spritzed generously with water, lifted off the stencil, and sprinkled with a few shades of green Brushos. After it was dry, I trimmed it down to the best section, stamped the sentiment, die cut a frame (twice so I could layer them together for more substance), added it all to a red card base, and added red gemstones to the berries in the image.


Supplies for card 1:
Paper - white, green, blue, and bronze shimmer cs
Size - A2
Accessories - TH Nordic Winter die

Supplies for card 2:
Stamps - Penny Black sentiment
Ink - Memento Cottage Ivy
Paper - watercolour paper, dark red cs
Size - A2
Accessories - Tim Holtz holly stencil, green Brushos, red gemstones, MFT pierced rectangle frame die


Monday, 3 March 2025

Two Birds with a Fence, and a Dove Framed with Snowflakes

My Time to Craft has a fun challenge.  It's called "1-2-3".  You have to use 1 of something, 2 of something else, and 3 of something else.  I have one fence, two birds, and three words.


I created a background with some blue watercolour paint to make a sky and some Distress Snowfall Grit Paste to make the snowy ground.  Added the die cut fence.  Then die cut two of the Time Holtz birds and did a bit of sponging on them with Distress Aged Mahogany.  Added them to the fence and ground, and finished with a three word sentiment on a banner die cut and some white splattering.

Try It on Tuesday wants to see embossing of some sort.  I went with both dry and heat embossing.  And I used a stamp I haven't used since I started my blog in 2015.  The last time I used it was in 2013 on a card I posted on SCS.  So I'm adding it to The Neglected Stuff Challenge.


I stamped my image / sentiment in dark blue in the centre of a layer of cs and then heat embossed it with clear embossing powder.  I coloured in the bird and the stars with a bit of lighter blue watercolour paint.  Then placed it in the snowflake embossing folder and ran it through my Cuttlebug.  

My Time To Craft!
Pop this on your blog to find us fast!  PLEASE HELP SPREAD THE WORD!


Supplies for card 1:
Stamps - unknown sentiment
Ink - Archival Cobalt ink, Distress Aged Mahogany
Paper - white and red cs
Size - 6x3.25"
Accessories - TH bird dies, unknown fence die, sentiment banner die, blue watercolour paint, Distress Snowfall Grit Paste, bleed proof white ink

Supplies for card 2:
Stamps - Stampendous Classic Peace
Ink - ColorBox royal blue
Paper - chalk cs
Size - A2
Accessories - Ultimate Crafts snowflake frame embossing folder, clear embossing powder, blue watercolour paint

Saturday, 1 March 2025

Sled Against a Brick Wall

The new Peace on Earth challenge's mood board has an image of a sled leaning against a brick wall.  It inspired this card.


Using the Tim Holtz brick wall stencil, I sponged with Hickory Smoke and Pumice Stone Distress inks, then went over it with translucent embossing paste.  I trimmed the panel and tore a piece of white cs to create snowy ground.  I stamped the sentiment on it in dark green (and chose a sentiment with the word "believe" in it to go with the word on the sled in the inspiration photo).  I die cut a couple of pieces of greenery (inspired by the greenery on the sled in the photo) and put them on the top of the wall.  I used a white pearl pen to put the white berries on one of them.  The sled is die cut twice from scrap cs and once from a leftover bit of brown smooshed cs, all glued together to give it more dimension.

There's lots more inspiration from the rest of our Design Team over at Peace on Earth!  We'd love to have you join us!


Supplies:
Stamps - Make an Impression sentiment
Ink - Distress Hickory Smoke and Pumice Stone, Memento Northern Pine
Paper - white and green cs, scrap of brown smooshed cs
Size - A2
Accessories - Tim Holtz brick wall stencil, Dreamweaver translucent embossing paste, Penny Black sled die, Tim Holtz greenery dies, Viva white pearl pen