A blog devoted to the cards I make in my tiny upstairs space. When my sister stays there, she calls it an "artist's garret". I'm not an artist, but am an enthusiastic cardmaker - hence the title "Cardmaker's Garret".
___________________________________________________________________________________________

Monday, 22 February 2016

Merry Monday Bells

I was thrilled to win the "chalkboard" challenge at Merry Monday last week!  It means they've invited me to be the Guest Designer for the upcoming challenge "Make a Card with Bells on It".

 Here's my card:


I had run off a bunch of pieces using a friend's musical score embossing folder and had this narrow strip of it sitting in my UFO box.  The space at the bottom made me think of a new stamp I recently bought - I thought it would work well with the curviness of the embossing folder.  Here's the stamp:


I knew I couldn't fit in the whole stamp, and all I really wanted was the sentiment, so I used my Versamarker to ink up the part I wanted and then heat embossed it in gold. It just fit!!  

I die cut three bells out of dark gold glitter cs and strung them on gold cord, keeping the curviness idea going.  The bells and the whole panel are popped up with foam tape.

Thank you, Merry Monday, for the honour!


Supplies:
Stamps - Great Impressions "Jingle All the Way"
Ink - Versamarker pen
Paper - white cs, gold glitter cs
Size - A2
Accessories - L'il Inker bell die, musical score embossing folder, gold cord, foam tape


Thursday, 18 February 2016

Emboss Resist Sleigh Ride

Before I get on to today's card, I want to share some exciting news.  Two of my favourite stampers, Loll Thompson and Bonnie Klass, are starting a new challenge blog on March 1st.  They are calling it CAS Mix Up Card Challenge.  It's perfect for those of us who make mainly CAS cards but want to dabble in a bit of mixed media.  So head on over and sign up!

This week's SCS Technique Lovers' Challenge is "Revisiting Emboss Resist".  I love emboss resist so made this card:


I stamped the sleigh ride and the sentiment in white and heat embossed it. Using lots of different Distress inks, I sponged the ground and sky.

For the snow, I sprinkled chunky white ep randomly over the sky and in a more controlled line along the "ground" the sleigh is on. I heated it from underneath.

The bell that is part of the sentiment stamp did not look right so I restamped it on a scrap of watercolour paper, heat embossed it in gold, painted the bell in gold, fussy cut it, and layered it over the original white bell.  Here's a close-up:


Thanks for stopping by!


Supplies:

Stamps: Great Impressions "Jingle All the Way", Tim Holtz sleigh
Paper: Penny Black luxury white cs, scrap of watercolour paper
Paper Size: A2
Ink: ColorBox white and gold; Distress Tumbled Glass, Faded Jeans, Stormy Sky, Chipped Sapphire, and Iced Spruce
Accessories: white embossing powder, gold watercolour paint, Frantage Chunky White embossing powder, fun foam sheet

Wednesday, 17 February 2016

Straight Up or Offset? Which Do You Prefer?


This week's Merry Monday challenge is to include berries on a Christmas card. 


I chose the lovely Festive Florals stamp as it reminded me of the image on the challenge.

I wanted to compare using my Zig brush markers on watercolour paper and cs. I used watercolour paper for this version.


I kept my panel centred and balanced the way I usually - totally my comfort zone.  I bordered the panel with a subtle dotted dp and mounted on a cream cardbase.

The second version uses cream cs for the image.


I like the results with the Zigs on both kinds of paper.  But I used the Zigs more as markers than as watercolour paints so it might not have been the best test.

When I cut out this panel with my stitched rectangle, I got the cs a bit crooked and slightly cut off one of the corners. So, given that I'm trying to be a little less rigid about mounting everything square and balanced, I angled it to compensate for the cut-off corner.

I'm curious - which do you prefer?


Supplies:

Stamps: Penny Black Festive Florals, Rubber Soul sentiment
Paper: cream cs, red cs, watercolour paper, red dotted dp
Paper Size: A2
Ink: Distress Archival Jet Black
Accessories: Zig brush markers, Lil Inker stitched rectangle, clear glitter, gold stickles, red ribbon

Monday, 15 February 2016

A Beautiful Colour Combination

This week's 52 Christmas Card Countdown is to make a card with blue, cream, and gold - love that colour combination!


I had a die cut gold Merry Christmas sitting in my extra pieces box so started with that. It works really well with the Rubbernecker winter trees stamp as the stamp has a flat bottom - perfect to edge with that sentiment die!

I inked up the stamp with two shades of blue ink, stamped on cream cs, added glue and glitter to the trees, and finished off with some die cut gold Christmas stars.

Thanks for dropping by!


Supplies:
Stamps: Rubbernecker
Paper: cream and gold cs
Paper Size: A2
Ink: Distress Faded Jeans and Chipped Sapphire
Accessories: Impression Obsession sentiment die, Memory Box star dies, Quickie glue pen, glitter, foam tape

Sunday, 14 February 2016

Cards for CASology and Merry Monday

I'm posting cards for two challenges that close today.  First up is CASology "Valentine".

Friends of mine and their black lab, Sally, are arriving to stay with me today, and since it's Valentine's Day and I thought it would be fun to give them a card.

When I was at Loll Thompson's house recently, we did some embossing folder stamping. I inked up a hearts embossing folder with various red inks, very lightly spritzed, and then stamped cs with it. Because it was a portrait-oriented ef, and I wanted this card to be landscape, I trimmed it down to just a small background piece.

The hearts were punched from a leftover piece of smooshing on watercolour paper.

It's also for the SCS CAS challenge "Won't You Call Me Sweetheart?".

Next up is Merry Monday's "Chalkboard" challenge.  Not my favourite technique to do, but I thought I'd give it a go.


I have a set of sentiment stamps by Whimsy called Christmas Chalkboards so this seemed the perfect opportunity to ink up one of them that I'd never used.

I stamped and heat embossed it in white on black cs, then smudged some white ink around it and added some snowflakes just using the ink.

I then die cut it, added it to a dp background, and embellished with a die cut branch and snowflakes. If I were to do it again, I'd leave off the branch as it makes it a bit too cluttered for my tastes!

Happy Valentine's Day!


Supplies for the Valentine:

Stamps: SU D is for Dog, SU sentiment
Paper: white cs, watercolour paper
Paper Size: A2
Ink: Memento Tuxedo Black, various red Distress inks
Accessories: hearts embossing folder, heart punch, red marker, Sizzix label die, foam dots

Supplies for the Chalkboard:
Stamps: Whimsy Chalkboard sentiments, Judith and Rubber Stamp Tapestry snowflakes
Paper: black and white cs, Pixie Press dp
Paper Size: A2
Ink: Hero Arts Snow
Accessories: Sizzix die, white embossing powder, Cheery Lynn snowflakes die, Tim Holtz branch die

Monday, 8 February 2016

Naked Stamping

Last week's Splitcoastampers Technique Lovers' Challenge was called "Naked Stamping".  The idea was to create a background with whatever medium we liked and then use line stamps over top to let the background medium show through (rather than colouring the image).

I chose to use my Brushos.  My first few attempts were disasters - my colours came out too strong or too muddy. I'd been using mixed media and watercolour papers. Then I went back to the coated cs I used when I first got my Brushos and had much better luck.  I ended up creating three cards, the first of which I'm really pleased with:


My plan was to end up with distinct patches of scarlet, yellow, and orange to kind of fit the stamp but the colours ran together a bit more than intended. I was okay with the peachy colour they made in the centre. I watered the Scarlet Brusho down quite a bit to get it pale enough. When dry, I stamped the poppies.

I then went on and made two much more simple variations with different stamps.  In both these cases, I used a single colour of Brushos.

I experimented with different inks for the stamping.  The first card uses black archival ink, the second uses a black pigment ink with clear embossing powder, and the third uses a green archival ink for a tone-on-tone look.

Thanks for dropping by!


Supplies:
Poppy card:
Stamps: Penny Black poppies, A Muse sentiment
Paper: ivory cs, coated cs
Paper Size: 5.25" square
Ink: Ranger Archival Jet Black
Accessories: black pearls, Lil Inkers stitched circle die, and Brushos (Scarlet, Orange, Yellow) 
Pansy card:
Stamps: Holly Berry House pansies, Paper Angel sentiment
Paper: white and black cs, coated cs
Paper Size: A2
Ink: Versafine Onyx Black
Accessories: violet Brushos, Sizzix die, clear embossing powder, Buttercup Liquid Pearls, foam tape

Holly card:
Stamps: Great Impressions
Paper: white and coated cs
Paper Size: A2
Ink: Ranger Archival Library Green
Accessories: L'il Inker stitched rectangle die, Sizzix embossing folder, green Brushos, red Stickles

Sunday, 7 February 2016

Merry Monday Santa

Sneaking in under the wire to get a card done for the Merry Monday "Santa" challenge!


I inked up a stamp I've had for a couple of years but never used!  I inked with brown ink for a more vintage look in keeping with the image.  I added colour with coloured pencils, used a die cut to trim and border, and a background of dp to provide the sentiment (and use up some of my stash!).


Supplies:
Stamps - Tim Holtz
Ink - Ranger Potting Soil
Paper - PTI Vintage Cream, Colorbok dp, scrap of red cs
Size - A2
Accessories - Nesties label dies, coloured pencils


Saturday, 6 February 2016

"Paint" Three Ways

Happy Little Stamps February Mixed Media Challenge is "Paint".  A friend was getting rid of a bunch of her supplies and gave me a lovely blue acrylic paint the other day.  Since blue is my favourite colour, I decided to use it for my Design Team contribution to the challenge.


My background was made with a piece of mixed media cardstock roughly painted first with gesso and, when it was dry, with the blue acrylic paint.  I tried stamping some small text in grey but it faded into the blue paint.  

I then took my TCW "Rustic Paint" stencil (as its name seemed totally appropriate for the challenge - it is the third way of using "paint"!) and went over some random sections of it with Dreamweaver embossing paste.

When dry, I watered down a bit of black ink and splattered it with a brush.  Like my attempt to stamp some text on the acrylic paint, it too faded into the blue.  But I'm fine with the subtle splatter.  Because of that fading, I used a rub-on sentiment to avoid having a stamped sentiment fade.

The Happy Little Stampers butterfly is stamped on watercolour paper and then coloured with Inktense watercolour pencils.  It's then die cut with the matching die and slightly curved and stuck on with foam tape under the wing.  I added a few sequins for a bit of sparkle.

I stepped outside of my comfort zone and put the black cardstock layer on an angle to the main panel - it just looked better that way (which is not something I would usually decide!)

Thanks for looking - we'd love to have you join us at Happy Little Stampers!


Supplies:
Stamps - Happy Little Stampers Butterfly Birthday
Ink - Ranger Archival Jet Black
Paper - mixed media cs, watercolour paper, white and black cs
Size - A2
Accessories - HLS butterfly die, "Thanks" rub-on, Dreamweaver embossing paste, TCS Rustic Paint stencil, gesso, blue acrylic paint, Inktense watercolour pencils, foam tape, sequins


Thursday, 4 February 2016

Christmas Tic Tac Toe at Happy Little Stampers


I love Tic Tac Toe challenges and that is exactly what Happy Little Stampers is offering as its Christmas Card Challenge for February:


I chose the diagonal line of gold, sentiment, and white, and came up with this card for my Design Team contribution:


I decided that, since "sentiment" was one of the Tic Tac Toe options I chose, the sentiment should be a prominent part of the card.  Also, I was on a roll of making cards with a musical theme for the January Christmas Card Challenge over at Splitcoaststampers.  I'd run off several embossed musical score backgrounds and had this one leftover.   It seemed perfect to go with the Whimsey stamp that is a line from a Christmas song.

I stamped and heat embossed the sentiment stamp in gold.  I wanted to border the image with gold cs but none of my gold cs matched the gold of the heat embossing so I cut a rectangle, edged it with the same ink and embossing powder as I used on the stamp - a wonderful tip I learned from Gina K to get a perfectly matched cs!

I embellished with a wooden snowflake that I burnished with gold metallic rub-on.

Come and join us at Happy Little Stampers for a chance to win a discount at the Happy Little Stampers shop!


Supplies:
Stamps - Whimsey sentiment
Ink - ColorBox Gold
Paper - white cs
Size - A2
Accessories - Cuttlebug music embossing folder, SU wooden snowflake, gold metallic rub-on


Tuesday, 2 February 2016

Musically Themed Christmas Cards

Every year, I take part in the Splitcoaststampers' Christmas Card Challenge.  It is a great way of getting lots of my Christmas cards made ahead of time.  You set a monthly quota for yourself and then post the cards you make each month.  There is no deadline so if you get behind, you can catch up another month.  And each month someone proposes an optional theme.  My monthly quota is 10.  January's theme was "music" and I did some of my cards using the theme.  Here are a few of them.

These two have simple gold heat embossed images / sentiments layered over a dry embossed musical score background.


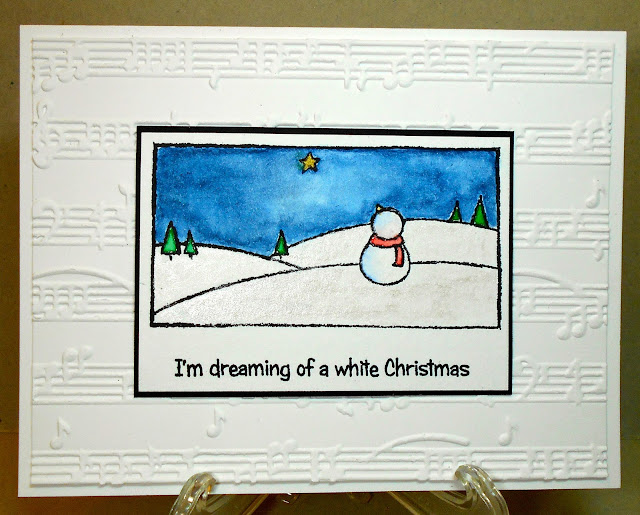
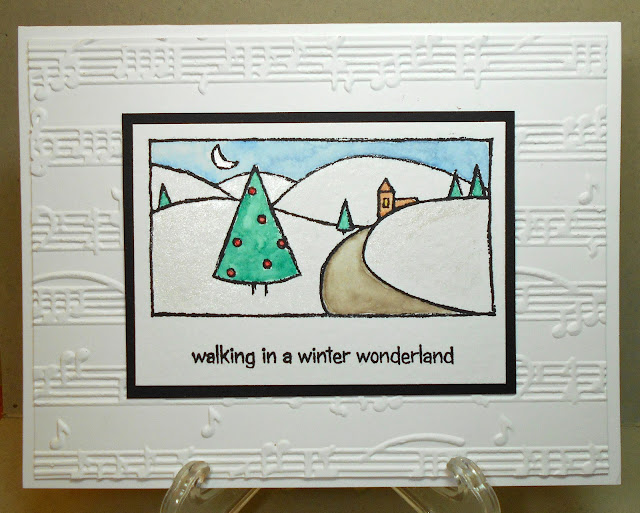
The last two have simple watercoloured images that go with lines from Christmas songs.  Again layered over embossed musical scores.


I have one more that will be posted in a couple of days.  Thanks for stopping by.


Supplies:
Stamps - Deep Red angels, SU sentiment, Whimsey Silent Night, Penny Black images and matching sentiments
Ink - ColorBox Gold, Archival Jet Black
Paper - white, gold, and black cs
Size - A2
Accessories - gold embossing powder, gold star ribbon, Spellbinders sentiment tag, Sizzix label die, gold sequins, foam tape, Kuretake watercolour paints, Cuttlebug and Sizzix embossing folders


Monday, 1 February 2016

Purple Lavender for Libbie

Today's CAS Challenge over on Splitcoast is "A Purple Birthday Celebration".  This was a good opportunity to get a birthday card made ahead of time for a friend who loves purple.


I started by sponging through a stencil with two shades of pale purple ink. Then inked up the lavender stamp with a dark purple and a green ink. I sponged a bit of blue around the top and edges, and went over the stamped flowers with clear Wink of Stella.

I had no cs that matched the purple ink so rubbed the dark purple ink over a scrap of cs and die cut my sentiment.

I used a Nesties rectangle to emboss a rectangle on the bordering white cs to frame the image.


Supplies:
Stamps: Impression Obsession Lavender stamp
Paper: white cs
Paper Size: A2
Ink: Distress Milled Lavender, Dusty Concord, Tumbled Glass, Bundled Sage, Shaded Lilac
Accessories: Memory Box stencil, Nesties rectangle die, Dee's Distincively birthday die, clear Wink of Stella, foam tape